Image Border Trimming, Padding and Rounding - General Overview
Please note that parts of this help page (and most of the images) were taken from
the 2D World Creator Scratchpad help system
because the 2D World Creator Scratchpad application has the three image tabs (Life, Nature and Extra) which provide the images to easily show
the features of the application.
Image Border Trimming, Padding and Rounding does not have the three tabs.
Image Border Trimming, Padding and Rounding is a program which allows you to quickly and easily
create image scenes. You can even create panoramic images. The program was designed to allow rapid manipulation of
images. It does this in a variety of ways. The canvas size can be adjusted easily giving a lot of
space for your image scene or panoramic image (the maximum width and height are both 9,000 pixels).
If you need more, just let us know.
Using this program, you can create virtually create anything you put your mind to in terms of image scenes.
Because it allows fast and easy manipulation of images, it can also be used as a tool to quickly create initial designs for projects of any kind including software applications and websites. The entire canvas containing the images can be saved as a PNG image to preserve transparency but other image formats (such as BMP, JPEG) are available.
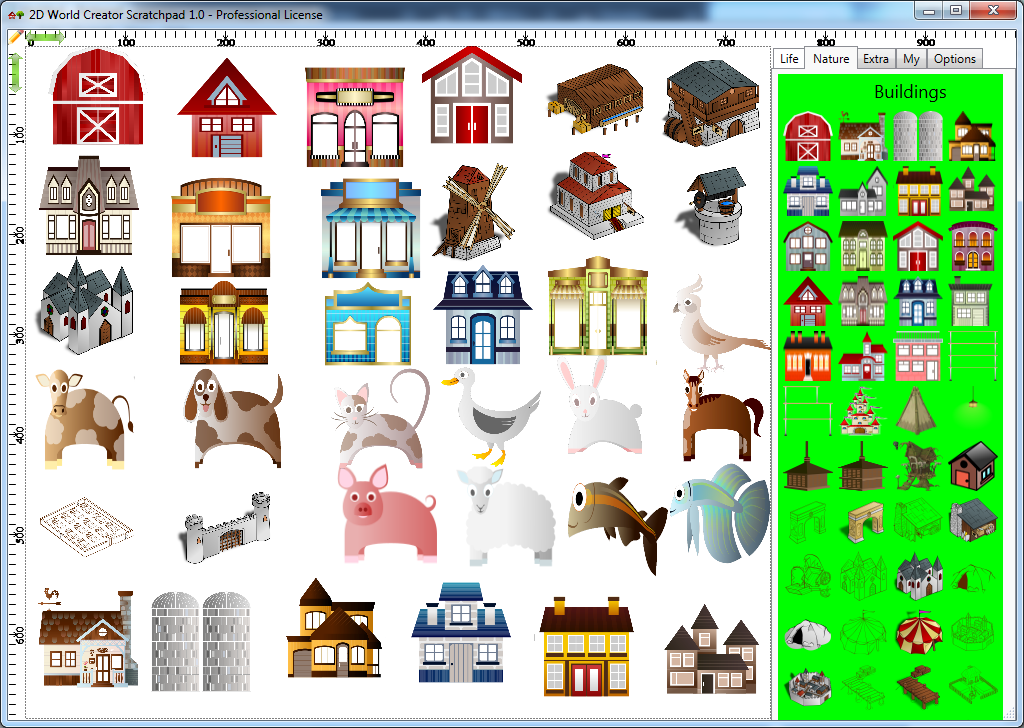
In the My tab you can store your own images or any images you want to have easy access to. A simple click will add that image to the canvas.
Using the Options tab you can access the application's settings. In this tab there is also a preview area where you can preview the entire canvas and there are also buttons to save the canvas as an image file.
Once an image is added to the canvas, you can do a variety of actions on that image like: drag, rotate, resize, filter, duplicate, see more below on how to do that. You can also right click the image to have access to more options.
Rotate, resize, duplicate, change opacity and drag images
Click any image from the "My" tab to add it to the canvas.
You can rotate an image clockwise or counter-clockwise. To rotate the image counter-clockwise, keep pressing the Left SHIFT key and click the mouse. The more you click the image (while pressing Left SHIFT) the more it will rotate counter-clockwise. Each rotation is done in steps of 5 degrees. To rotate the image clockwise, keep pressing the Right SHIFT key and click the mouse. The more you click the image (while pressing Right SHIFT) the more it will rotate clockwise. Each rotation is done in steps of 5 degrees (this is the default) but you can change this number from the "Options" tab.
When you have a picture and you rotate it manually in steps of 2, 3, 5 degrees, etc until a certain number for example 90 degrees and then you use the Quick Filters to rotate Horizontally (or Vertically) please notice that the application first rotates it Horizontally or Vertically depending on what you initially selected and then rotates it to 90 degrees.
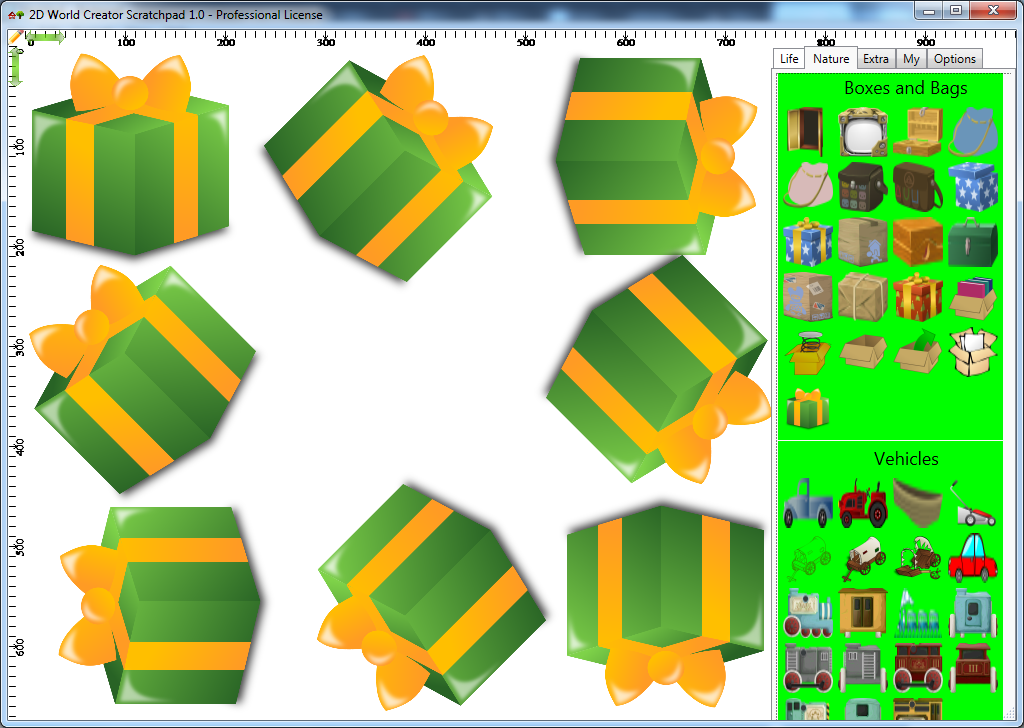
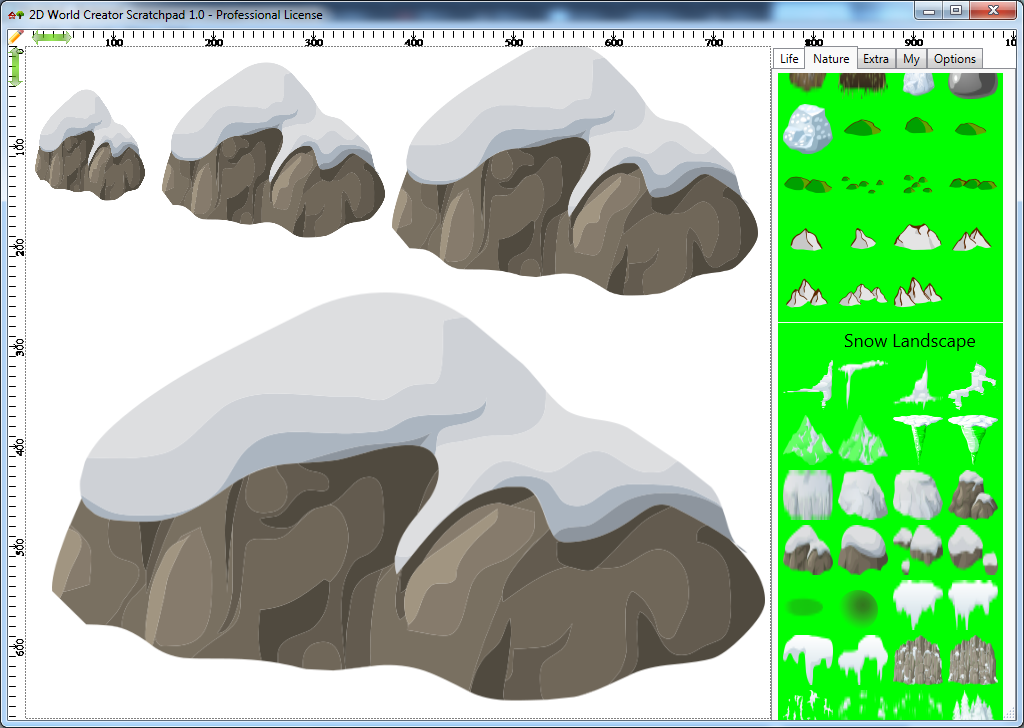
To resize an image, press any of the CTRL keys and click the image (keep the left mouse button clicked) and drag the mouse around. As you drag the mouse around (while keeping any of the CTRL keys pressed), the image will be resized. When you're done resizing, release the mouse.
You can prevent an image from being deleted, resized, dragged or rotated, notice the image properties which can be accessed by right clicking an image and selecting Image Properties -> Enable/Disable Dragging, Enable/Disable Rotating, Enable/Disable Rotating, Enable/Disable Deletion from Key (Del)
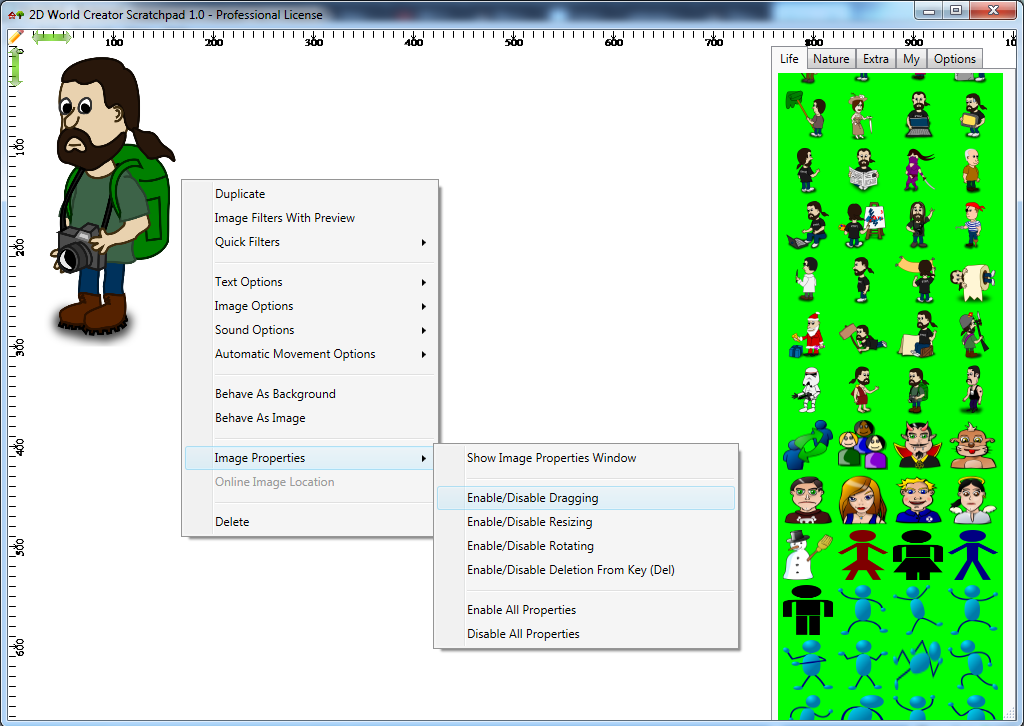
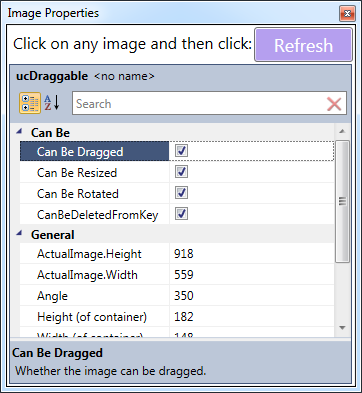
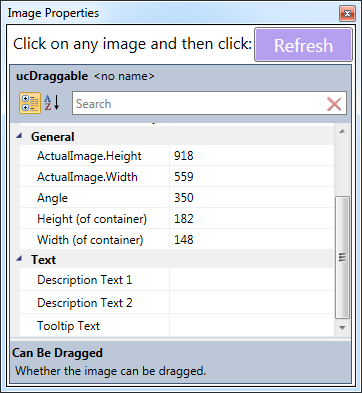
Notice the "Show Image Properties Window" in the image above. That option shows the Image Properties window in which the properties mentioned above (dragging, resizing, rotating, deletion from key) and other properties as well can be set, notice the two images below:
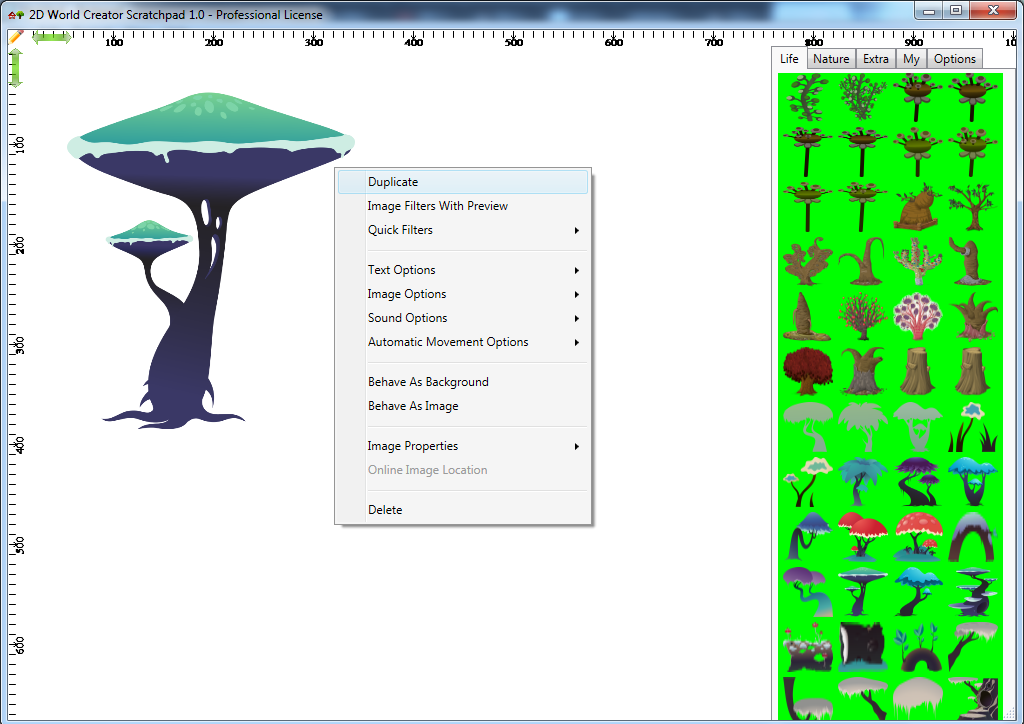
To duplicate an image, right click that image and choose the "Duplicate" menu option from the context menu which shows up. Another way to duplicate an image is to double click it.
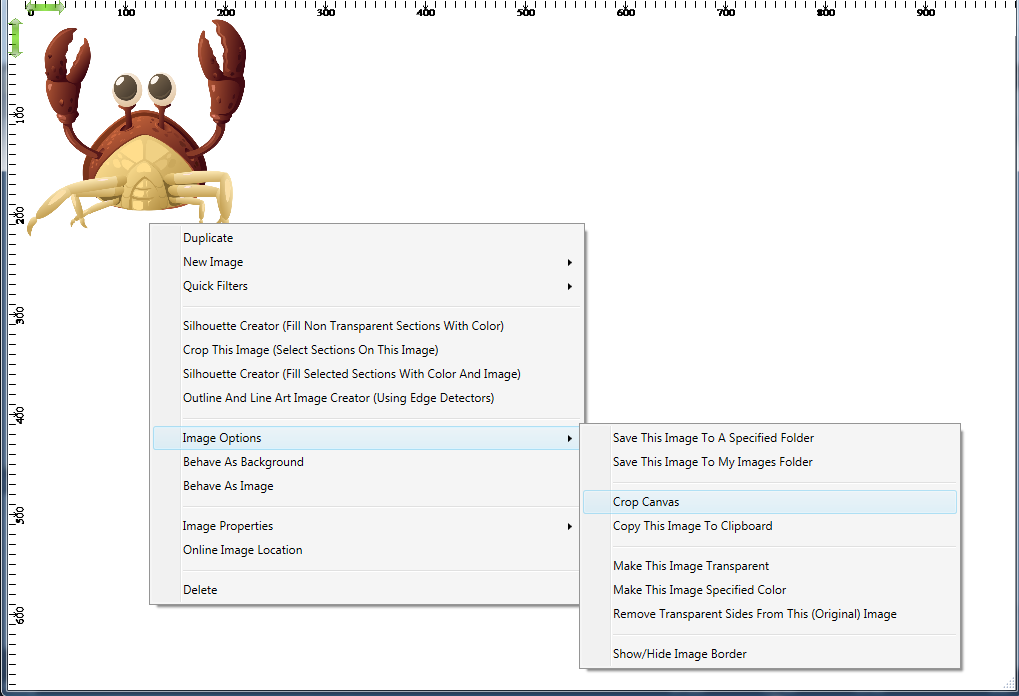
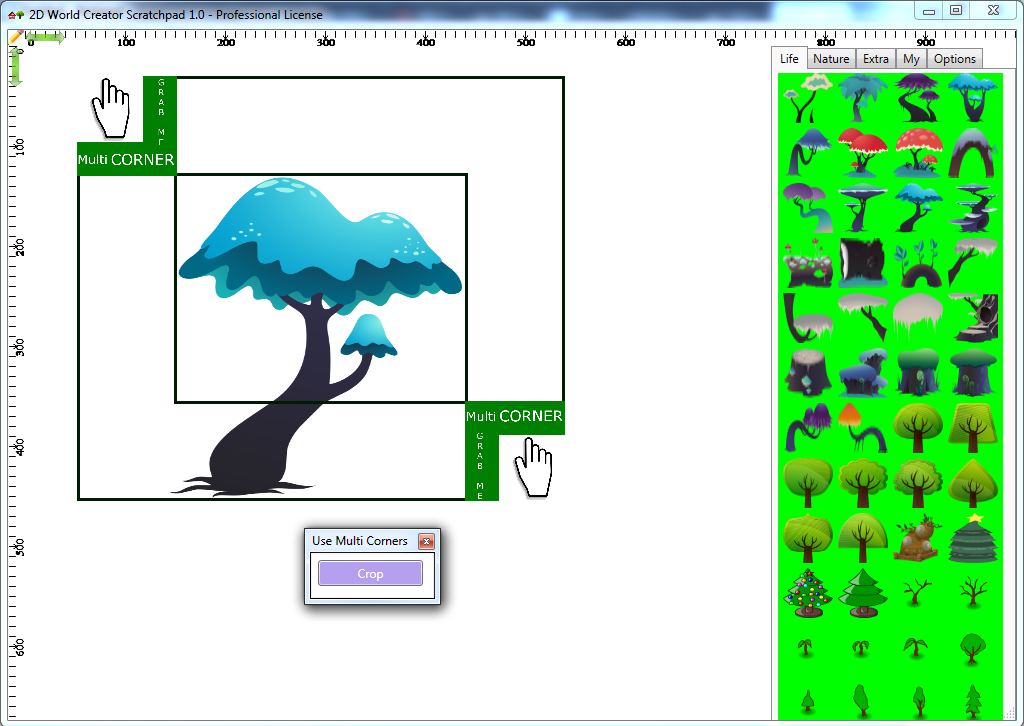
To crop the canvas, right click an image once then select Image Options -> Crop Canvas menu option. This will make the Multi Corners appear (if they aren't already visible) and a small floating window with the "Crop" button in it. You can then move the Multi Corners to match the portion of the image you want to crop and when you decided on the region you want to crop, you can press the Crop button in the floating window. When you're done cropping an image you can close the floating window and delete the Multi Corners. To delete them you can click on one of them and click the Delete key. Please notice that the crop functionality requires all controls to be entirely visible within the canvas. Notice the two images below, the first one shows how to activate the crop functionality and the second one shows it activated.
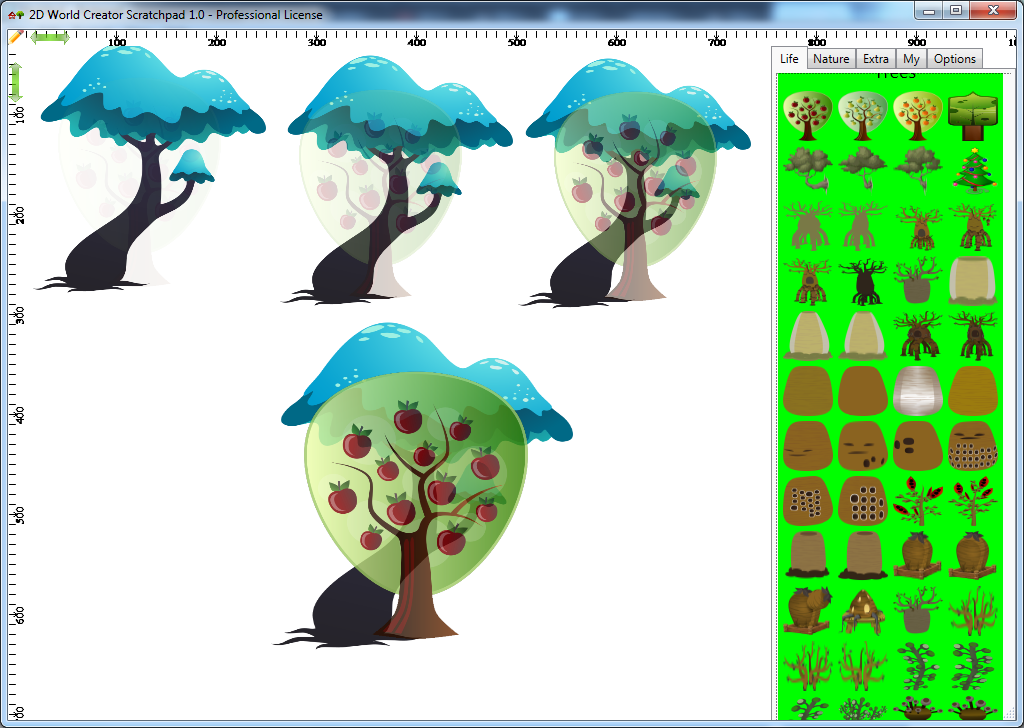
To change the opacity of an image, click that image once (so it may be the last clicked image) and press CTRL + Q to increase the opacity or press CTRL + A to decrease the opacity. The opacity is increased or decreased in steps of 5.
To drag an image on the canvas, click that image (left mouse button) and drag it around. You can also click the image and use the arrow keys to move it around the canvas. Another way of moving an image is to use the movement controller window, see below.
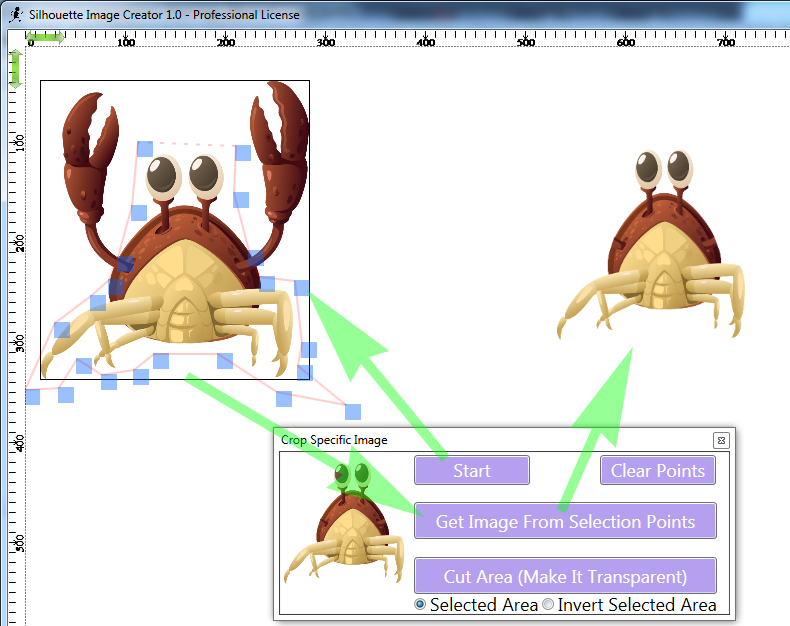
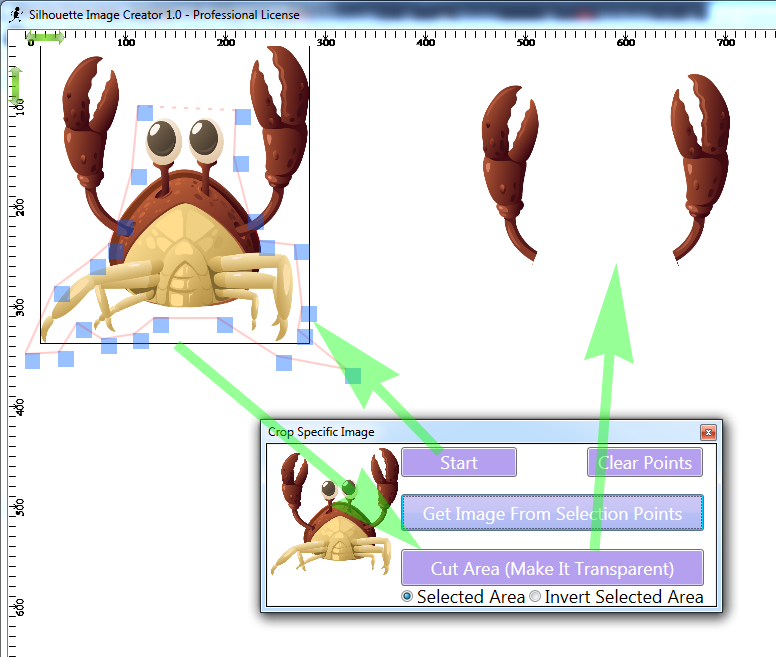
To crop a specific image you can right click that image and choose "Crop This Image (Select Sections On This Image)" which will open the "Crop Specific Image" window. To start the cropping process you need to click on any image on the canvas then on the Start button and then start clicking that image to add points marking the region which will be either cut or made transparent, notice the "Get Image From Selected Points" and "Cut Area (Make It Transparent)" buttons:
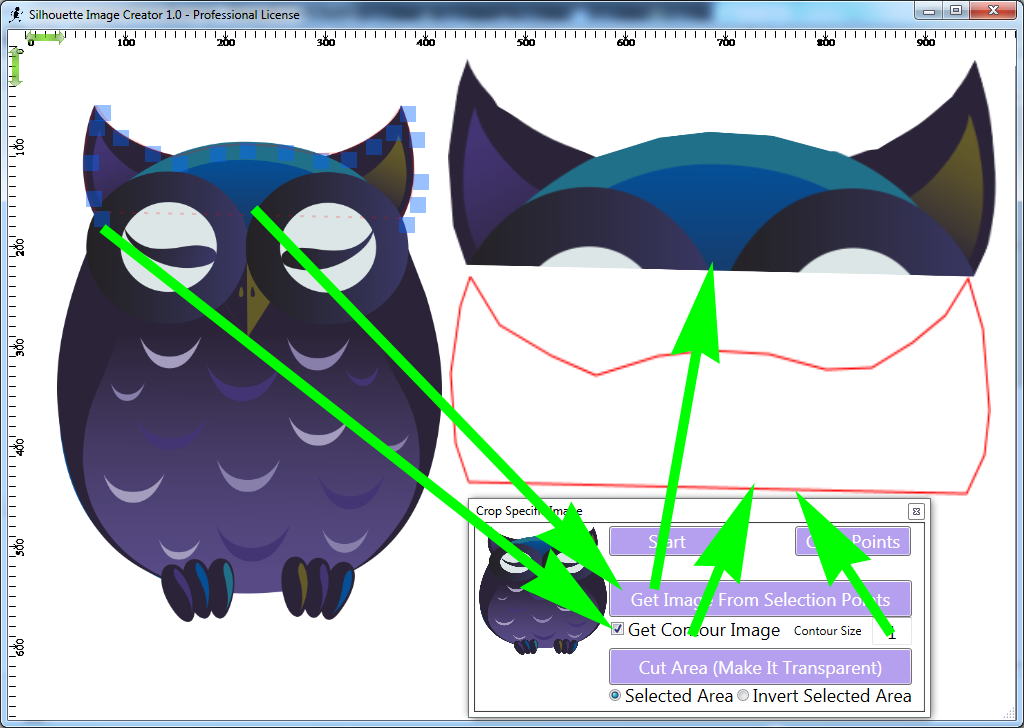
Using this window you can also get the outline marked by the cropping points you added on that image, just check the "Get Contour Image" check box and then "Get Image From Selection Points" button:
Make an image behave as a background image
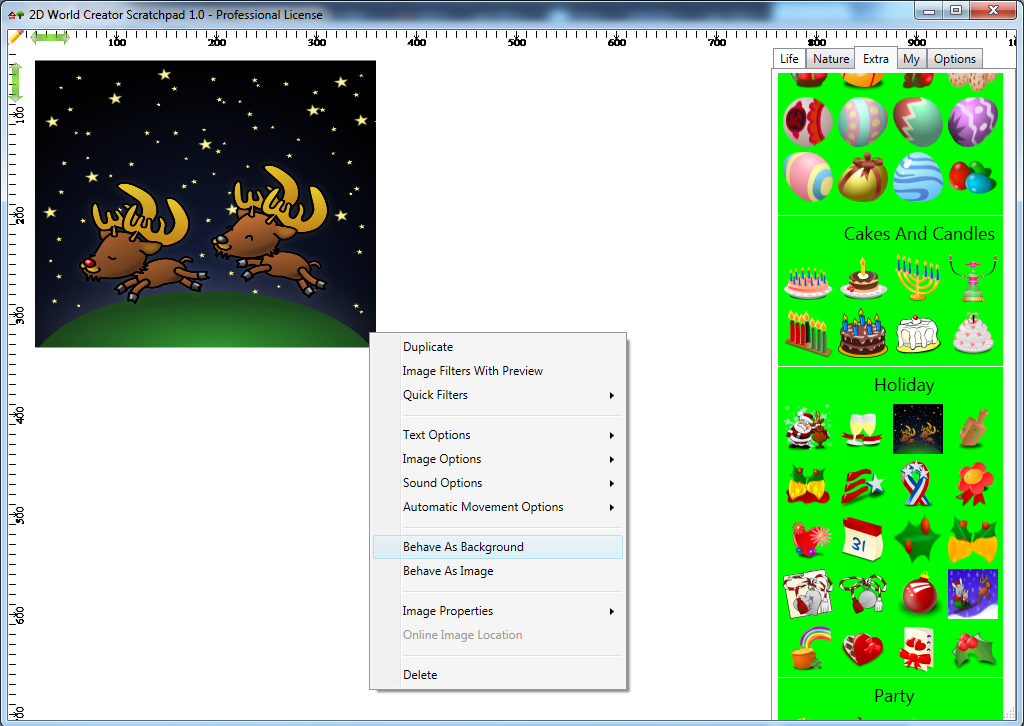
An image can behave as a normal image or as a background image. When an image behaves as a background image, it will stay below the images which are set to behave as normal images. To specify how an image should behave, right click it and select one of the options "Behave as Background" or "Behave as Image".
To access the Quick Filters menu right click an image and click Quick Filters. These are options which apply to the last selected image on the canvas. These options are considered to be the most frequently used operations which can be performed on an image.
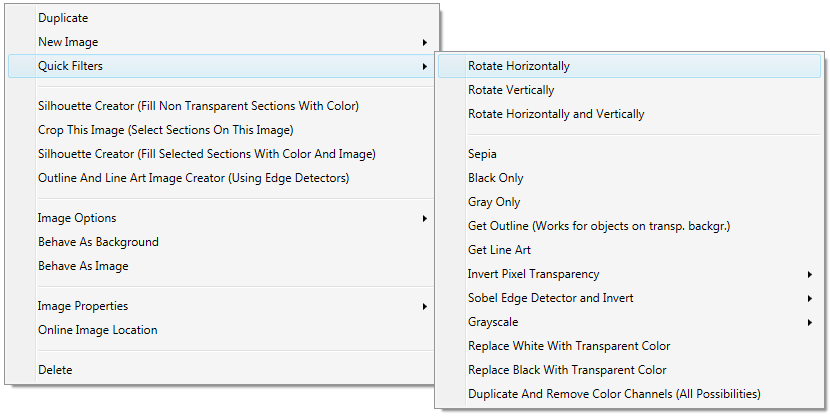
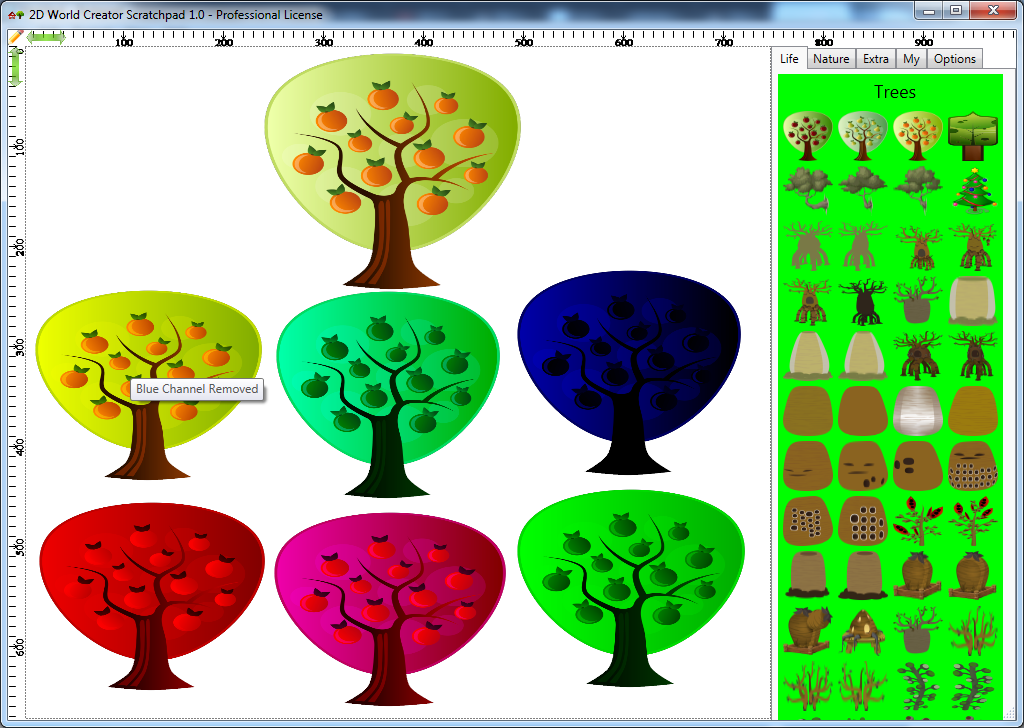
Notice the option called "Duplicate And Remove Color Channels (All Possibilities)" which duplicates the selected image and removes color channels (red, green, blue, red and blue, red and green, green and blue) in the duplicated images. The duplicated images have a tooltip (text shown when hovering over the image) showing which channel was removed.
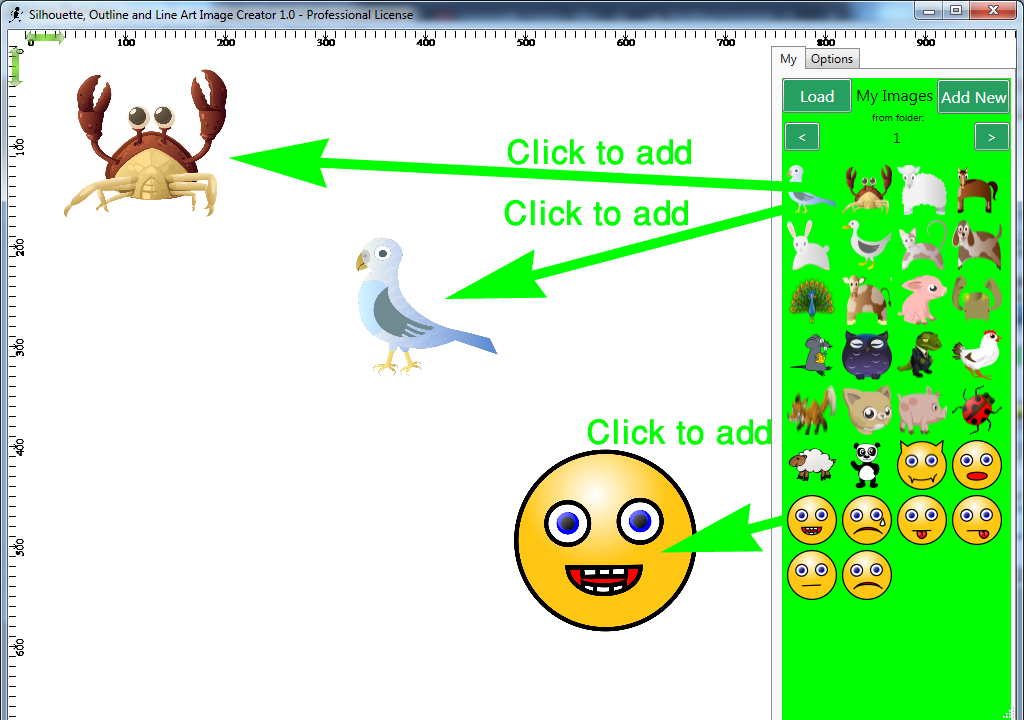
The first tab is called "My" and is used to store your own images. It is grouped in folders called "1", "2", etc. You can click the name of the folder to open it with Windows Explorer. As you move between folders, the images are loaded automatically in that section but when the program starts, the images in the first section (the one which appears when you open the application) are not automatically loaded so in that case, you can use the "Load" button to load the images in that section.
Add image borders (rectangular or rounded) and trim image borders
Padding images
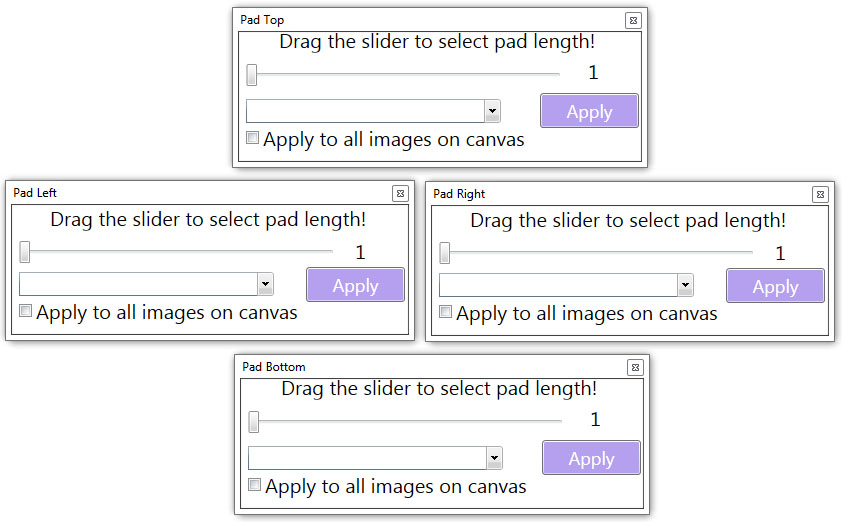
You can pad images either padding all image sides in the same time or padding each image side individually (one at a time).
To padd all sides in the same time, add an image on the canvas, right click that image and then choose the "Pad All Sides (Add Paddin On All Sides Of The Images)".
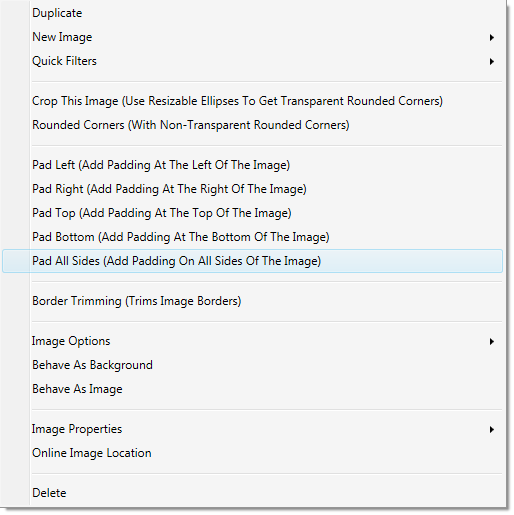
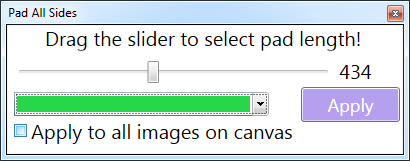
The other padding menu options each opens a small window allowing the padding of all sides: top, left, right, bottom.
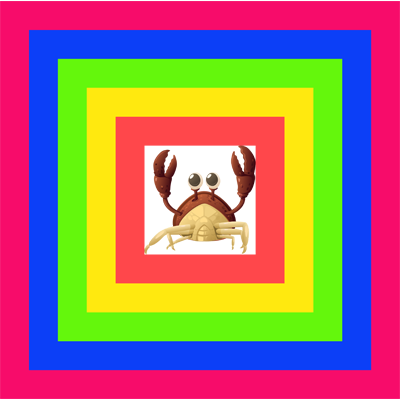
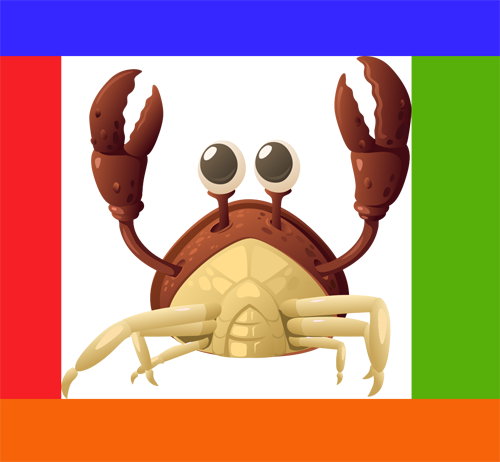
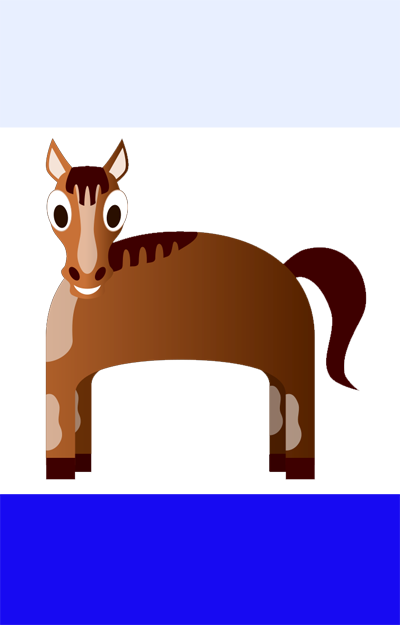
Here are a few examples of padded images:

Rounding corners
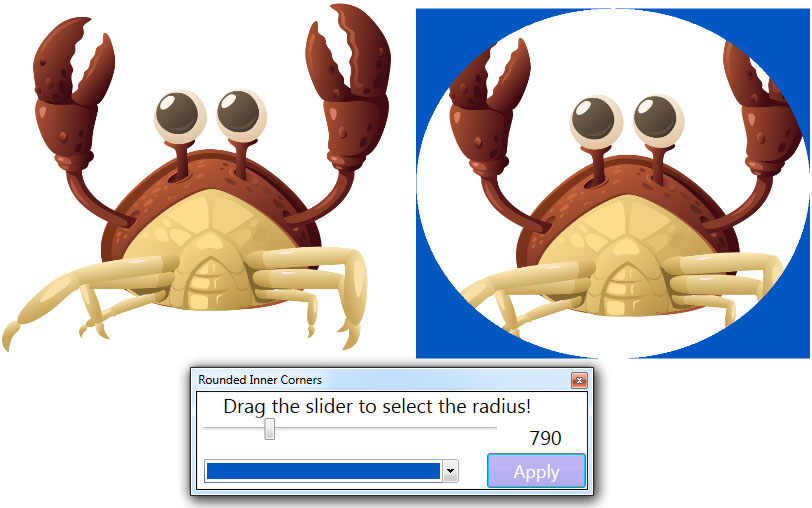
There are two types of rounded corners you can create for an image:
- outter rounded corners: you can cut a portion of the image using a resizable ellipse.
and
- inner rounded corners: the image does have normal external corners but it has a circle around it,
the bigger the radius of the circle, the higher the inner image area that gets covered by the circle.
Outter rounded corners
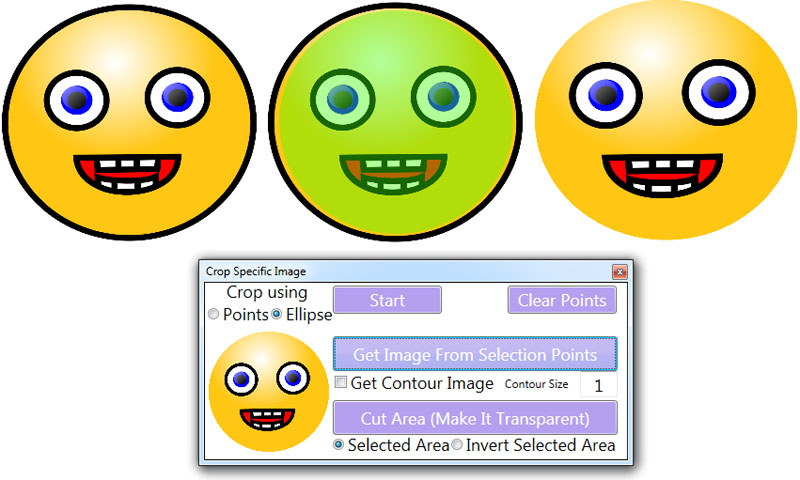
To get these, right-click on the image, and select the "Crop This Image" window, that will open the "Crop Specific Image" menu option, select the "Ellipse" radio button in that window, click the "Start" button (which will turn into the "Stop" button) and click the image to add an ellipse, after adding the ellipse inside the image, you can click the "Stop" button (which will turn into the "Start" button). You can resize the ellipse normally to cut the image you want from the image which contains that ellipse.
Inner rounded corners
Border Trimming
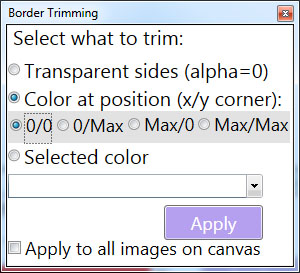
Right-click the image and select the "Border Trimming (Trimms Image Borders)" menu option,
that will open the "Border Trimming" window.
Using it you can delete the borders of images as following:
- borders which are transparent on all image sides
- borders which have the same color on all image sides (here you only specify from which corner to take the color):
0/0 (x=0/y=0) or 0/Max (x=0/y=Max) or Max/0 (x=Max/y=0) or Max/Max (x=Max/y=0)
- borders which have a specific color on any side
Quickly scroll the canvas to work on different parts of it
To quickly scroll the canvas you have two options.
The first option is to move your mouse toward the edges of the application's window and continue to move the mouse in that area. As you continue to move the mouse the canvas will scroll revealing more content.
The second option to quick scroll the canvas is to use the arrow keys.
Shortcuts for different actions
To move an image: click on that image and then use the W, S, A, D keys.
To resize an image: CTRL + Mouse Click and start dragging the mouse around.
To rotate an image counter-clockwise: Left Shift + Mouse Click. The image will be rotated each time in steps of 5 degrees.
To rotate an image clockwise: Right Shift + Mouse Click. The image will be rotated each time in steps of 5 degrees.
To delete an image: click it and press the Delete key.
Use the arrow keys to move around the canvas. The canvas needs to be clicked first to receive focus.
To duplicate an image: Left CTRL + D or Right CTRL + D.
To increase the opacity of an image: Left CTRL + Q. The opacity is increased in steps of 5.
To decrease the opacity of an image: Left CTRL + A. The opacity is decreased in steps of 5.
To show and hide the border around an image : Left CTRL + B.
To change the scale of the selected image, press CTRL + [ to decrease the scale and CTRL + ] to increase the scale. To reset the scale to 1 press CTRL + \ The minimum scale is 1.0
To bring an image size to its original width/height press CTRL + Enter.
Useful functionalities for handling images
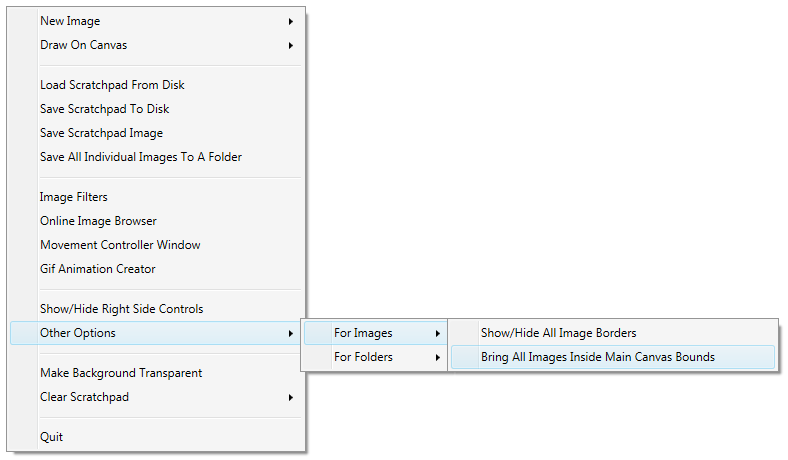
At times you may want to see the borders of all images or to bring all images which are outside of the canvas borders into the canvas borders. To do this, right click the canvas, choose Other Options -> For Images -> Show/Hide All Image Borders and Other Options -> For Images -> Bring All Images Inside Main Canvas Borders
1. In order for the application to function correctly, please ensure that you have installed
the correct version for your system. If your system is a 32 bit system then please install
the 32 bit version of the application. If your system is a 64 bit system then please install
the 64 bit version of the application.
2. The application uses GDI+ which affects the maximum size of the images you can use in the application.
3. When the canvas is smaller than the screen (for example the canvas has 200 pixels/200 pixels when the screen is 1024/768),
and if the canvas has a Transparent background, to see its boundaries you can temporarily choose a non transparent color for the
background and then when you're done working on the canvas, you can set the color back to Transparent.
4. The output formats you can use to save an image are: PNG, WMF, TIFF, MEMORYBMP, EXIF, EMF, BMP and JPG.
5. For more functionalities, besides the ones offered in "Image Border Trimming, Padding and Rounding", please check out
Scratchpad For Images and
2D World Creator Scratchpad.
These two applications are virtually the same except for the contained images.