Silhouette, Outline and Line Art Image Creator
Silhouette, Outline and Line Art Image Creator was built based on Scratchpad For Images. However
Silhouette, Outline and Line Art Image Creator focuses mainly on features for creating silhouettes, outlines, and line art images. It also includes all the basic features of Scratchpad For Images such as dragging, cropping, and rotating images.
For many more features including those available in Silhouette, Outline and Line Art Image Creator,
please see Scratchpad For Images.
The Silhouette, Outline and Line Art Image Creator application comes with 31 public-domain images that you can use
to easily test the application's features: transforming the images into silhouette, outline and line art images.
The 31 public-domain images are included in the 'My' tab, which supports multiple folders for storing
your own images for easy access, for example to add an image to the canvas from the 'My' tab, you simply click that
image.
Being built based on Scratchpad For Images, this application also allows easy and time-saving manipulation
for your own images and can be used to create image compositions using images created from scratch, images from
your hard drive, or your own imported images.
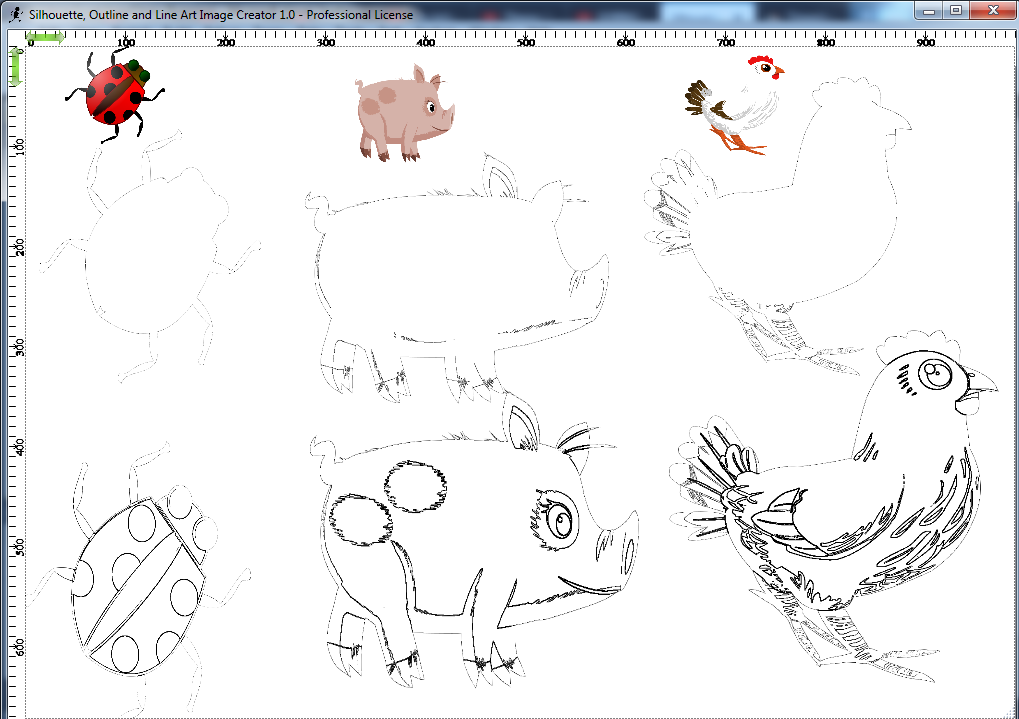
The Silhouette, Outline and Line Art Image Creator application also features image rotation, image resizing,
image filtering (there are a few filters available in the Quick Filters context menu), image duplication,
dragging images across the canvas, quick canvas scrolling, generating an image based on all images on
the canvas as well as a section (the 'My' tab) to store your preferred images, which can be later added
to the canvas by a simple click of the mouse.
The final image can be saved as a PNG to preserve transparency. You can also save the image in the following formats:
WMF, TIFF, MEMORYBMP, EXIF, EMF, BMP and JPG.
Silhouette, Outline and Line Art Image Creator runs on Windows XP, Vista, 7, 8/8.1, 10, and 11 in both 32-bit and 64-bit versions
Purchase Silhouette, Outline and Line Art Image Creator license at 51% off ($4.90)
Download the app (64 bit version)
Contact us for the 32 bit version download URL
Download - Version 1.0
The instructions below are meant to provide a quick overview of how to use the application, however for complete instructions, please see the online help files for this application: Read the Help files
Main Screen -
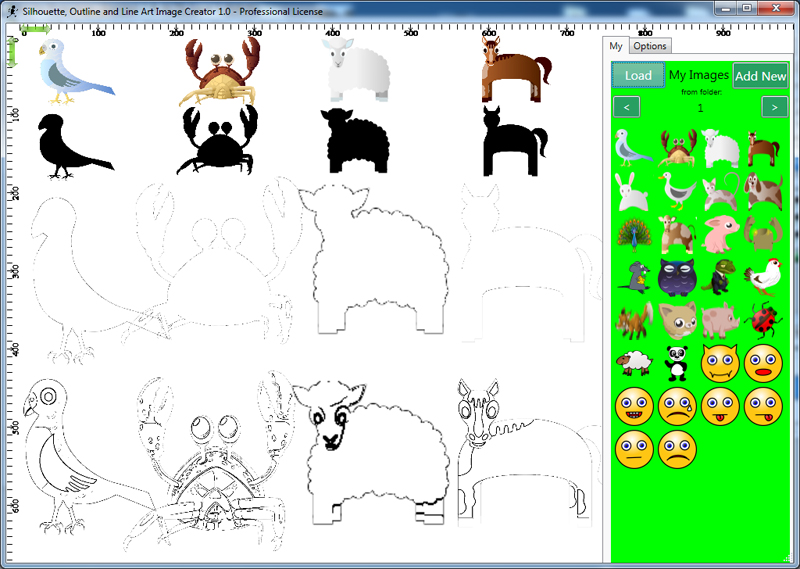
Once you start the application, you are presented with the canvas
on the left and the two tabs ('My' and 'Options') on the right.
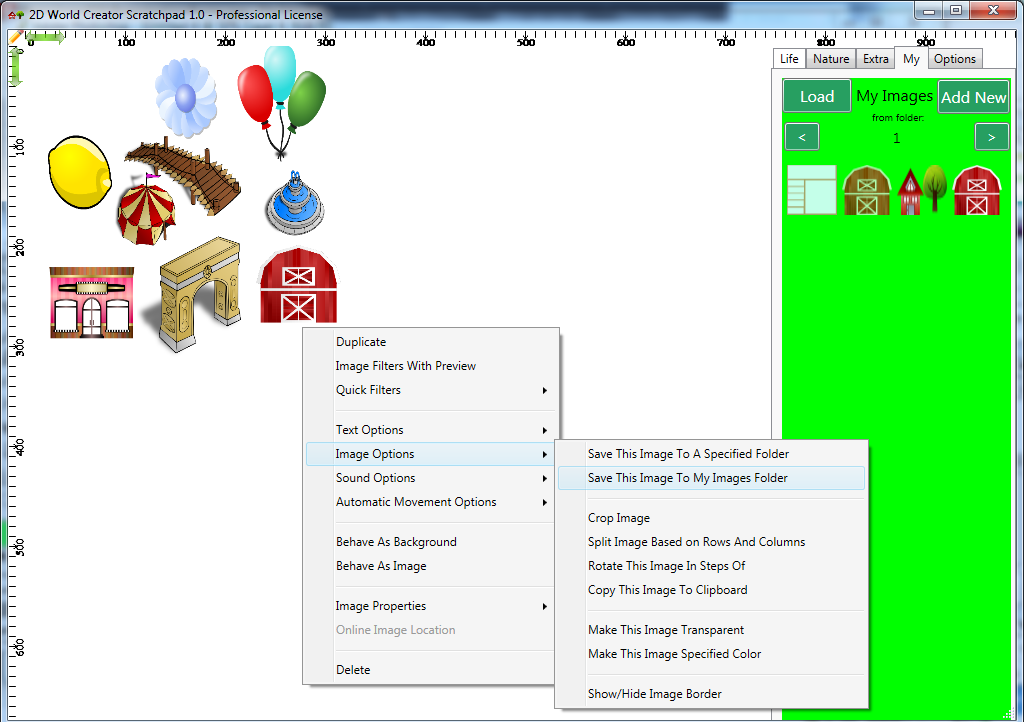
To see the existing images in the 'My' tab, you need to click the Load button.
The images in the 'My' tab are not loaded automatically when the program starts, allowing the application to load faster.
To scroll up and down to see all images in the 'My' panel, you can hover the mouse near the top
(for scrolling up) and bottom (for scrolling down) of the panel/section containing the
built-in images.
For scrolling, you can also click the panel containing the images and then either
use the UP and DOWN arrow keys or the Page Up and Page Down keys.
To add an image to the canvas, simply click that image.
You can right-click the canvas or an individual image to see more options.
To make the canvas bigger, right-click it, and select "Show/Hide Right Side Controls" however
if you want to increase its pixel size, go to the Options tab and use the sliders under the
Scratchpad Dimensions section.
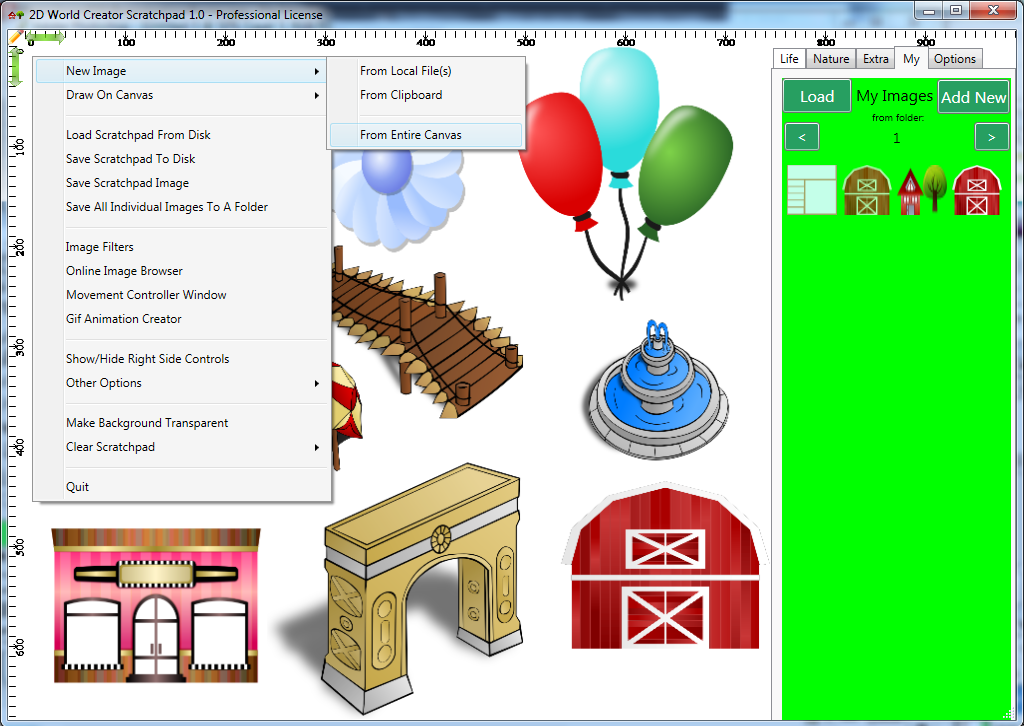
My Images Screen - After having built a part of your final image or the final image itself,
you can right-click the Canvas and select "New Image" -> "From Entire Canvas" (make sure
the background of the canvas is Transparent for this to work correctly).
This will add to the canvas, an image of the current canvas content.
Then you can right-click this newly added image and add it to the "My Images" section in the
folder which is currently active. You can have as many folders as you like in the
"My Images" section (just press the "Add New" button).
You can scroll the folders in the "My Images" section using the top left
and right buttons in that section.
For easier scrolling among "My Images" folders it is advisable to keep
a few hundred images (instead of thousands of images) inside each folder.
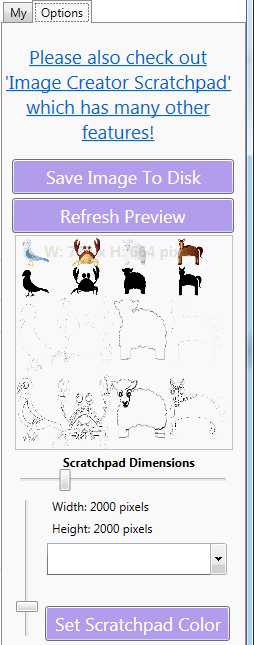
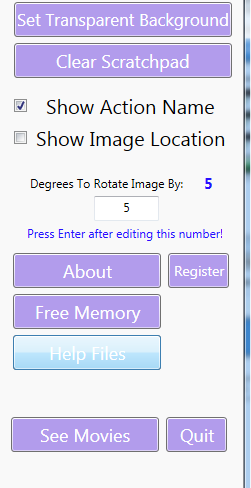
Options Screen - On this screen you have options like
"Save Image To Disk", "Refresh Preview", "Set Scratchpad Color",
"Set Transparent Background", "Clear Scratchpad", and "Help Files". You can also set the scratchpad dimensions and access several other options. See the images below:
Creating Silhouettes, Outlines and Line Art Images
Silhouettes
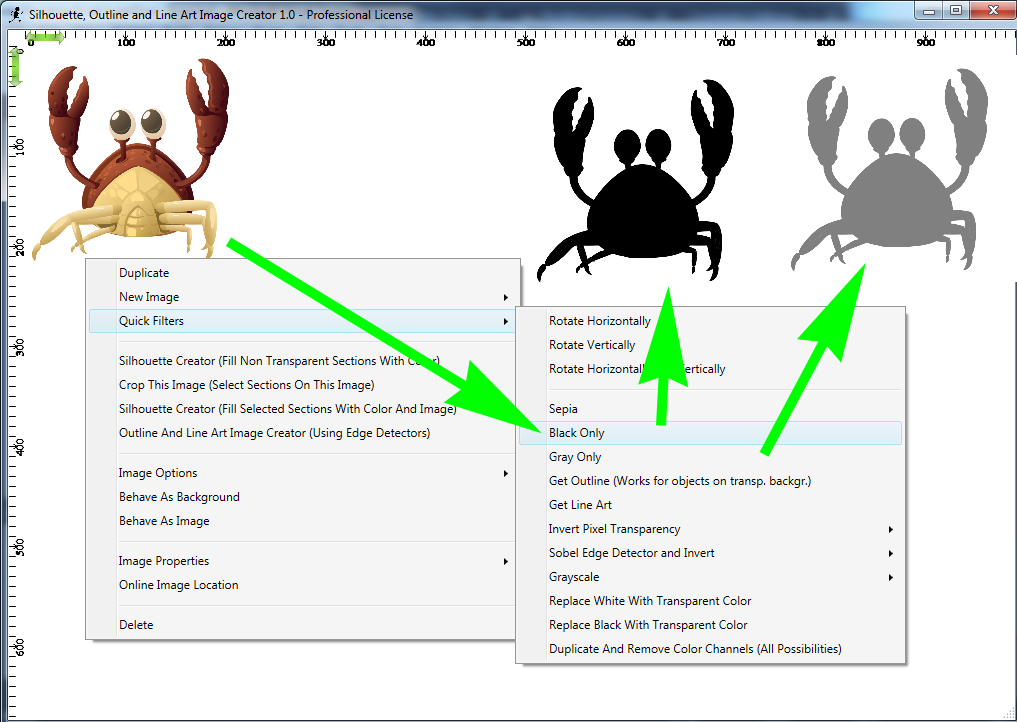
The easiest way is to get a silhouette from an image which consists of an object on a transparent background. To do this, right-click the image, choose Quick Filters and then the Black Only (or Gray only) menu option. That will fill all non transparent sections on that image with black (or gray), please see the two images below. If the image does not have transparent sections then the entire image will be filled with black (or gray), so this functionality should be called only for images which consist of an object on a transparent background, otherwise if you call it on an image which doesn't have any transparent sections, it will paint the entire image with black (or gray).
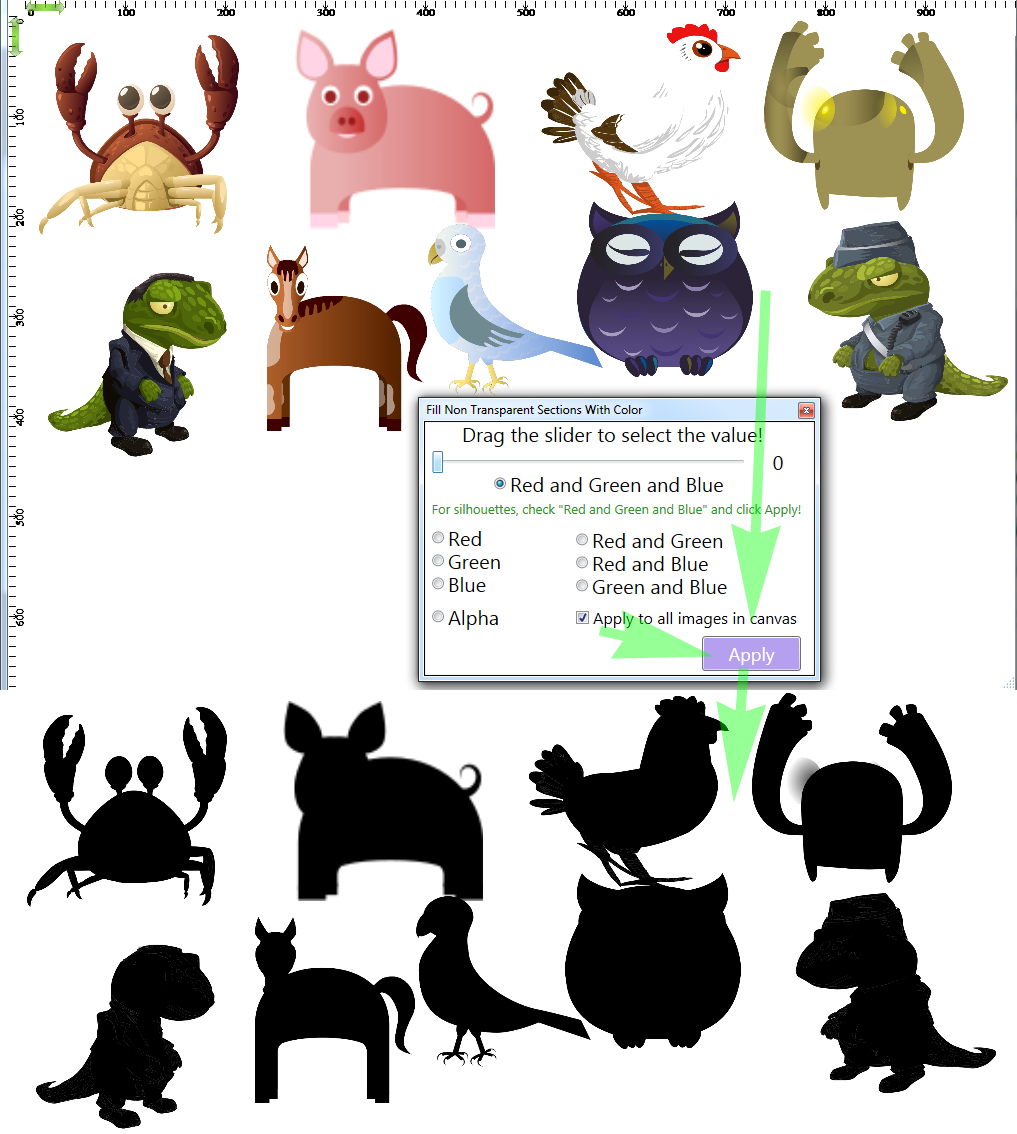
The same thing (black and gray) can be accomplished using the "Fill Non Transparent Sections With Color" window, please see the image below:
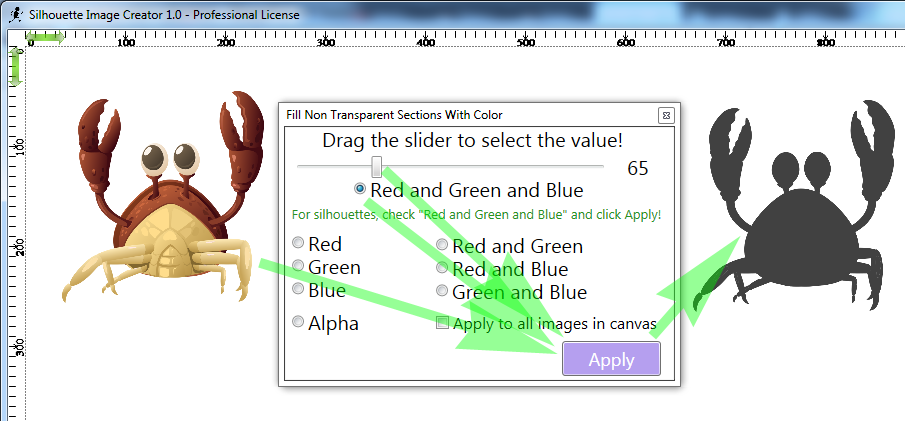
Besides getting black or gray silhouettes (filling the non transparent sections with black and gray) you can actually fill them in with any color you want, notice the Silhouette Creator (Fill Non Transparent Sections With Color) menu option in the above image. That menu option will open the "Fill Non Transparent Sections With Color" window which allows full manipulation of the color channels which will be filled with the selected slider value, please see image below. For example to get a red silhouette, you should fill all channels of the image (select the "Red and Green and Blue" radio button) with the value 0 (zero) and then fill the red channel with the value 255.
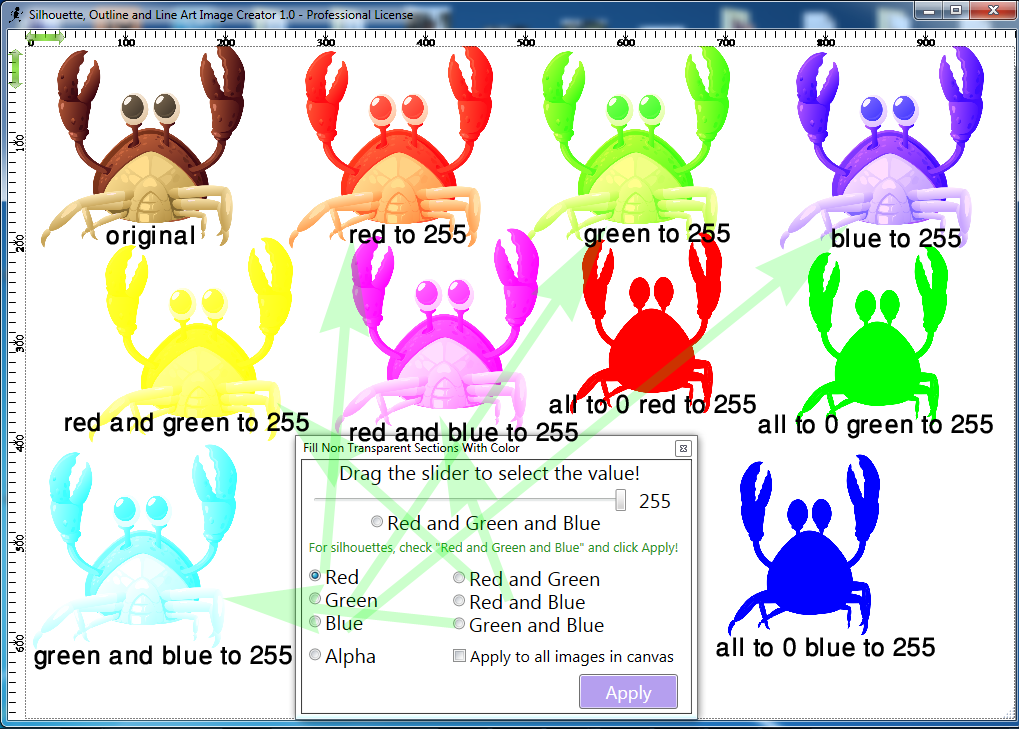
This window allows applying the silhouette generation (filling the color channels with a value) for all images on the canvas automatically, notice the "Apply to all images in canvas" checkbox. Here is an example of how that could look like, please notice the image below:
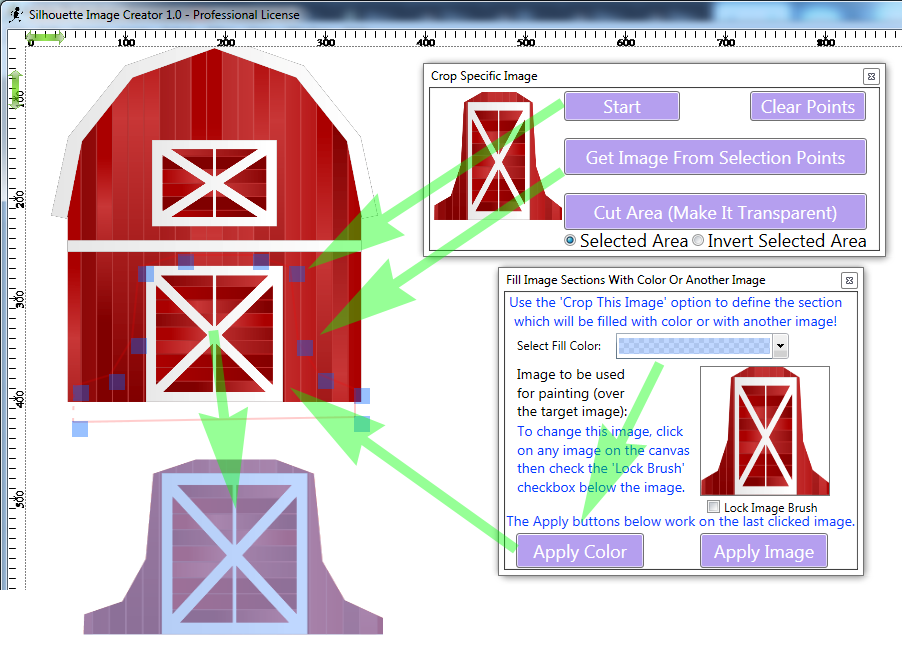
Another way to create a silhouette is to crop a specific section of an image from an existing image and then fill the cropped image with color or with another image or using the methods already mentioned above. To start the cropping process, you need to right-click the image and select the Crop This Image (Select Sections On This Image) menu option and then you should also click on the Silhouette Creator (Fill Selected Sections With Color And Image) menu option. Please notice the image below to see how the cropping of an image works using these two mentioned windows:
Outlines and Line Art Images
The easiest way to get the outline of an image or transform that image into a line art image
is to access the Outline and Get Line Art menu options under the Quick Filters menu option when you click on an image.
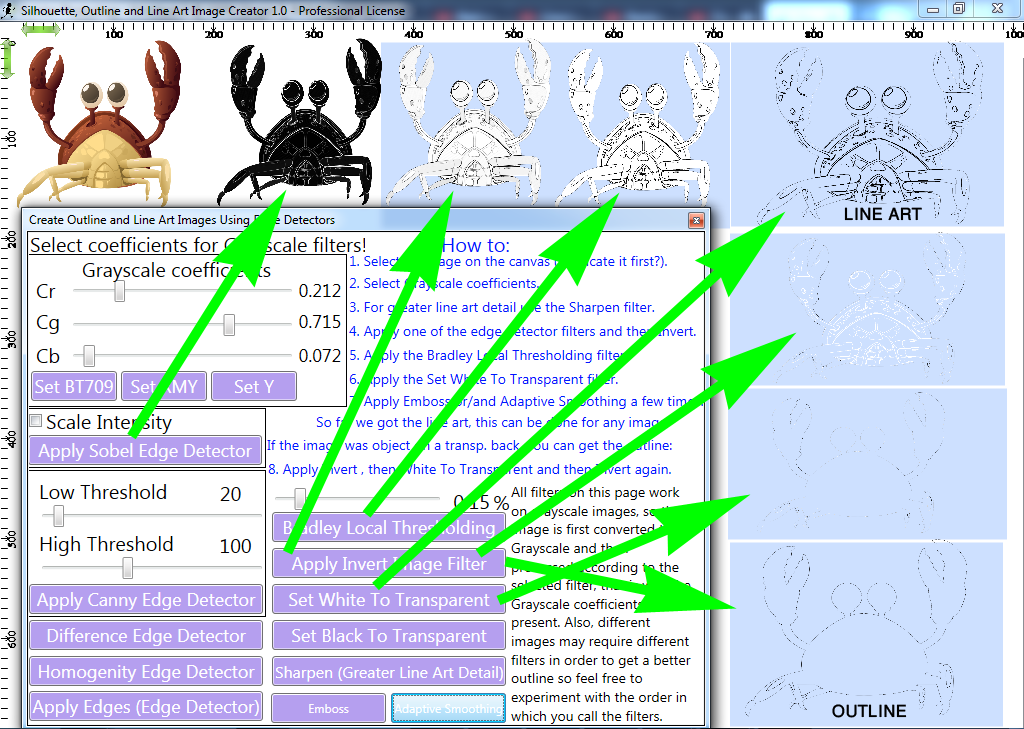
Another option is to use the Outline And Line Art Image Creator (Using Edge Detectors) menu option which appears after right-clicking on the main canvas.
That will open the "Create Outline and Line Art Images Using Edge Detectors" window which already contains the instructions on how to use it to create an outline of an image or transform an image into line art.
Here are a few more examples of outline and line art images:
Next Step: Imagine what you can do using the built-in images, your own images or images from the Internet. For a large collection of images that can be used commercially for free, visit: OpenClipArt.Org