 Put Images On A Path
The Put Images On A Path application allows working with images which follow a custom path you can define on your own.
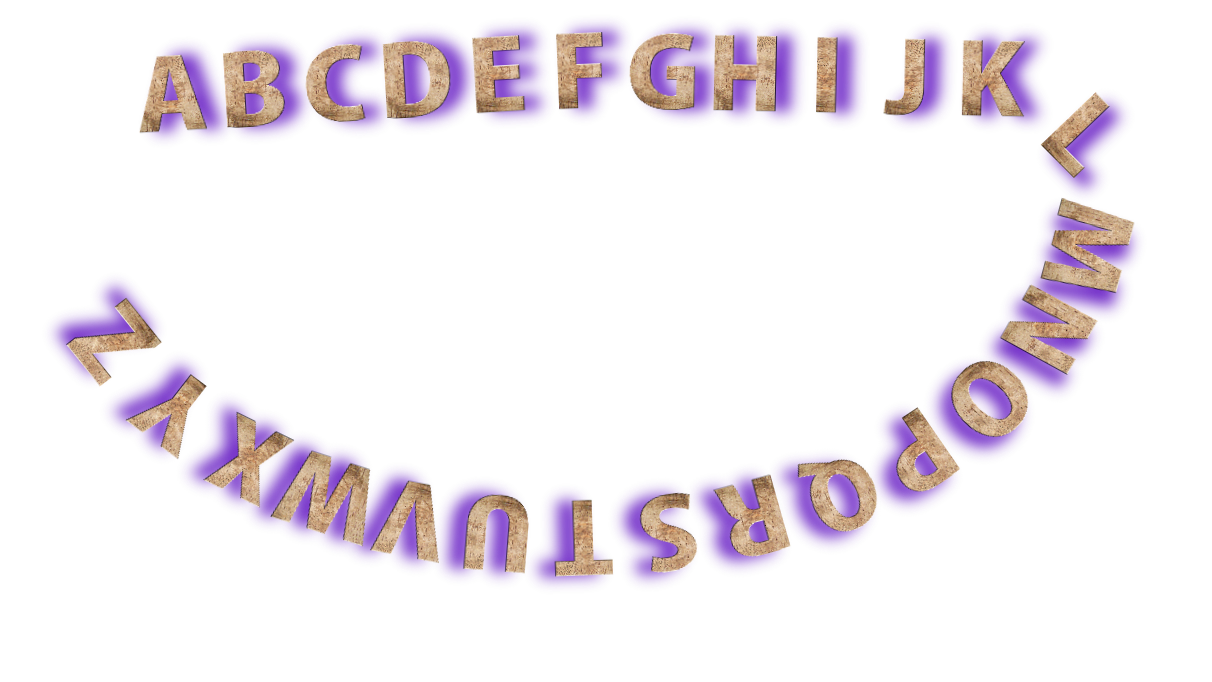
Besides being able to put any images on the path you desire, this application gives you the power to write with images. Imagine being able to define your own custom alphabets (as in many custom alphabets) and make one on one associations between any ASCII or UTF-8 character and a (.png) image, then you just specify the text you want to be rendered in the application and the application renders that text using the images you specified in the associations of that custom alphabet. It's that easy using this application. We even have a custom alphabet provided which you can make a copy of and then modify your copy (replace the images and edit the associations of that alphabet) thus building a new custom alphabet.

You can then beautify the images by using image filters or by using the following effects available using the right sidebar: the Drop shadow effect and the Blur effect.
Using this application you can do the following:
You can define the path the text will follow using one of the following:
You can also create a path from the following shapes but the application allows having only one of these on the canvas at any given time:

Besides creating a path for the images using any of the above items, you can also specify your own text using the Edit Text button at the top, or the Edit Text menu option when you right-click in the working area. That text will then be rendered int he working area using images based on the letter = image associations found in the currently selected alphabet.
When you are done defining the path, the text, the selection of the alphabet, the values/properties of any of the effects, you can press the Get Image button at the top to get the final image made of all the images which follow the path made by the points in the working area.
You can then:
The application also has several Presets. A preset contains predefined text, points and effects which provide a start to easily creating new beautiful text images. For example, you could use one of these presets by loading it (press the Go New Tab button) and then by modifying the actual text you want to see rendered using the current alphabet. Then you can press the Get Image button to get the image of that text (rendered with images) as defined by the preset. This means you don't have to recreate the path (the position of the points and their type), the values/properties of the effects (colors, etc) to get that specific image because those were already created for you through that preset, and all you need is to plug in the text of your choice, that text will then be rendered using the images from the current alphabet.
A preset specifies the following:
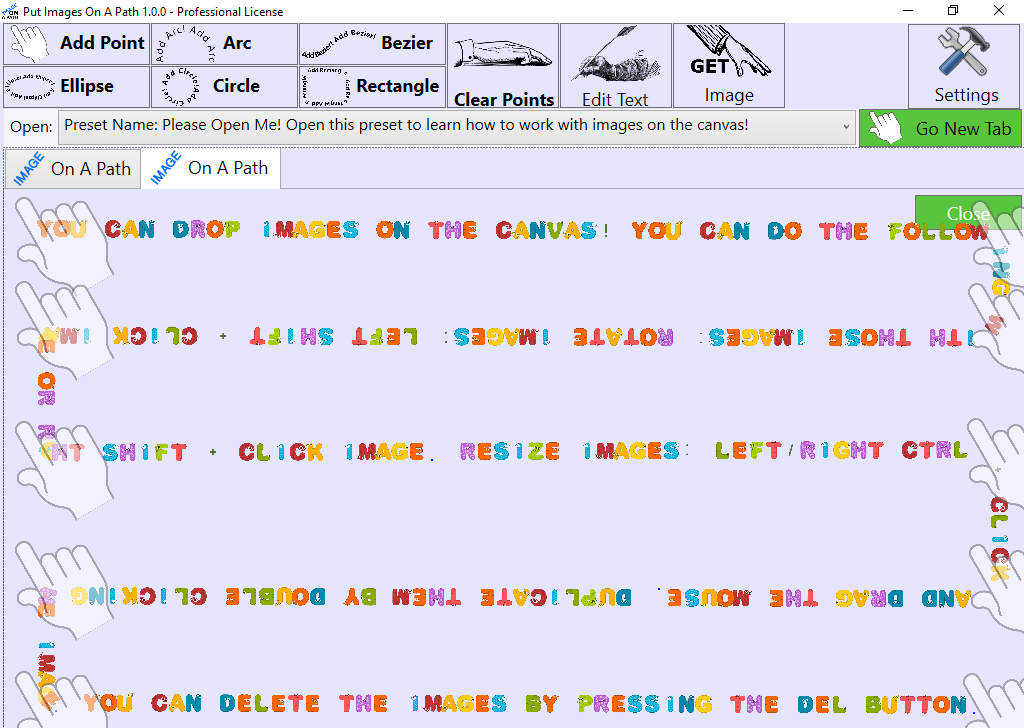
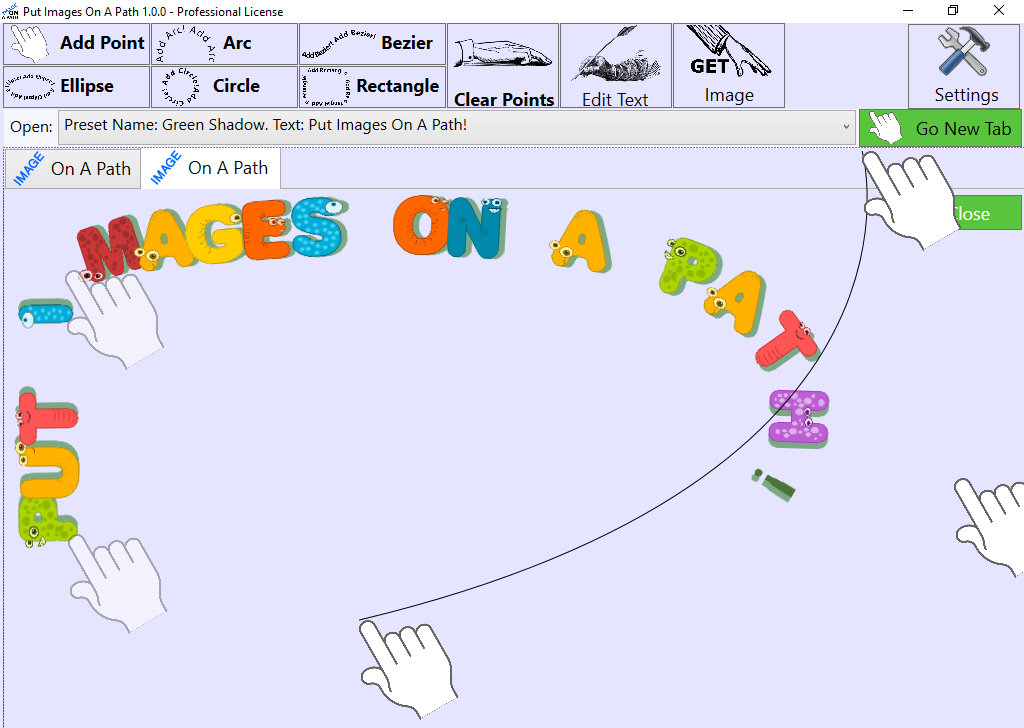
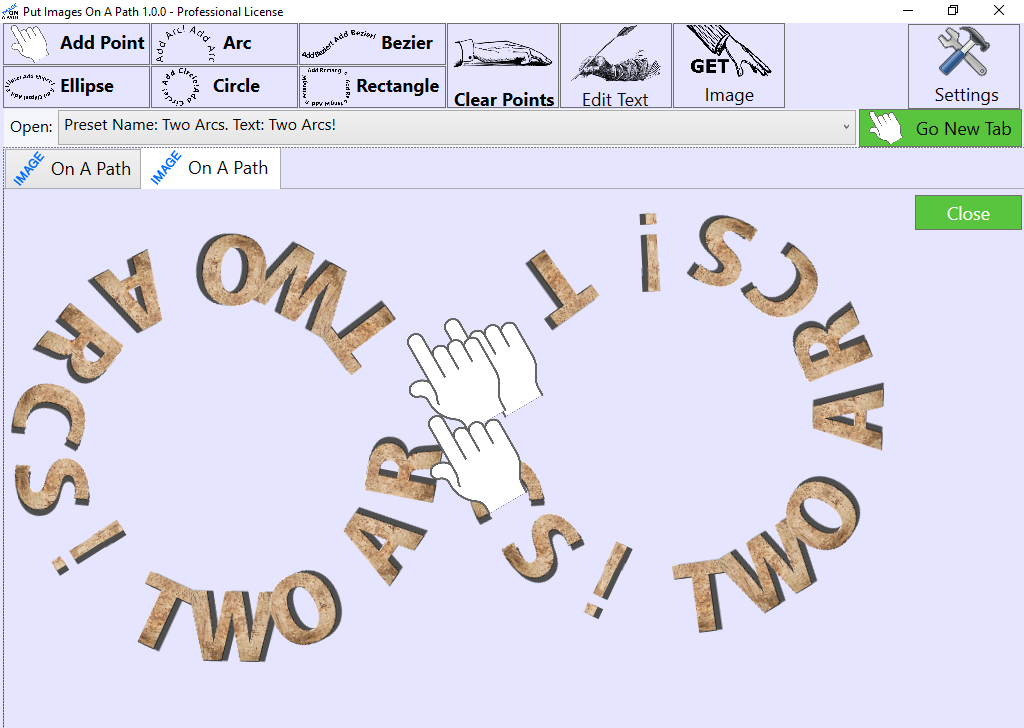
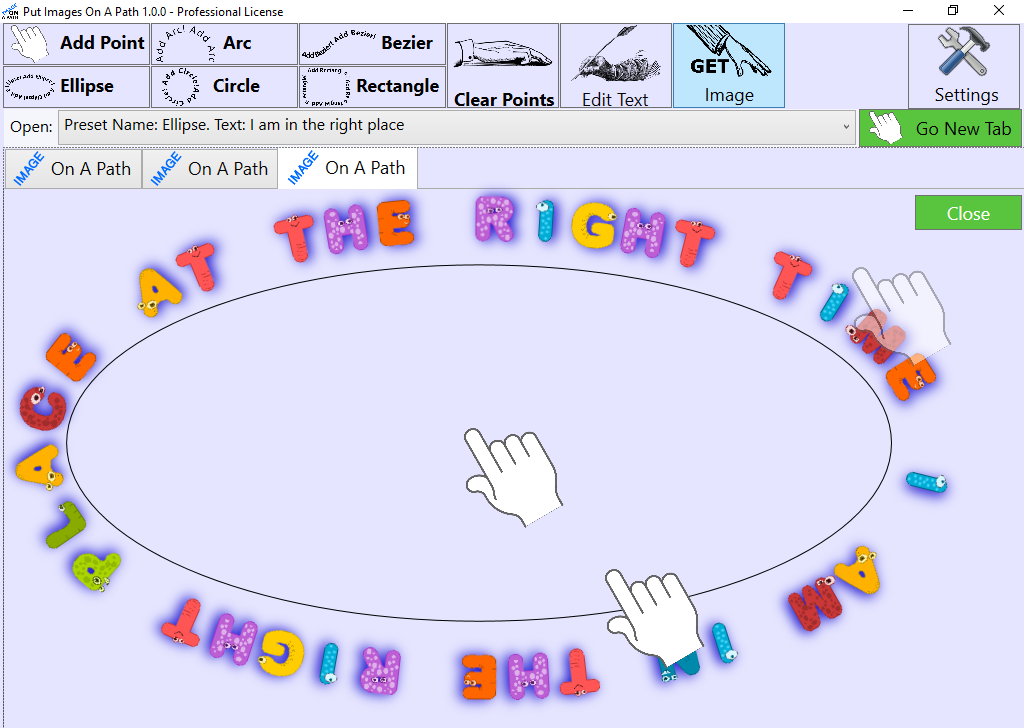
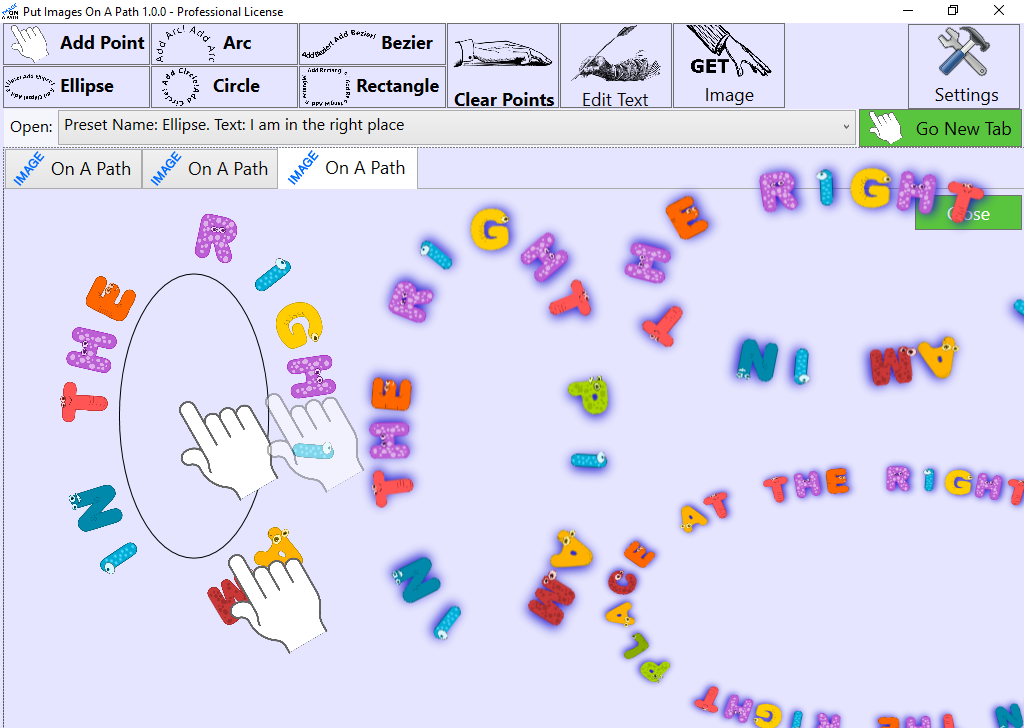
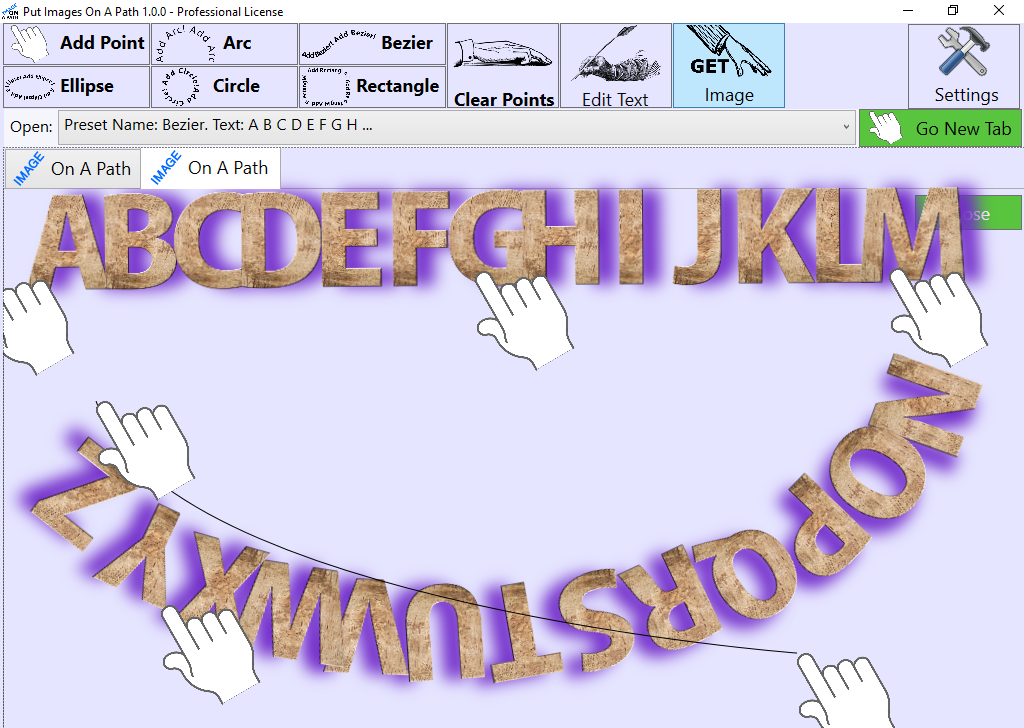
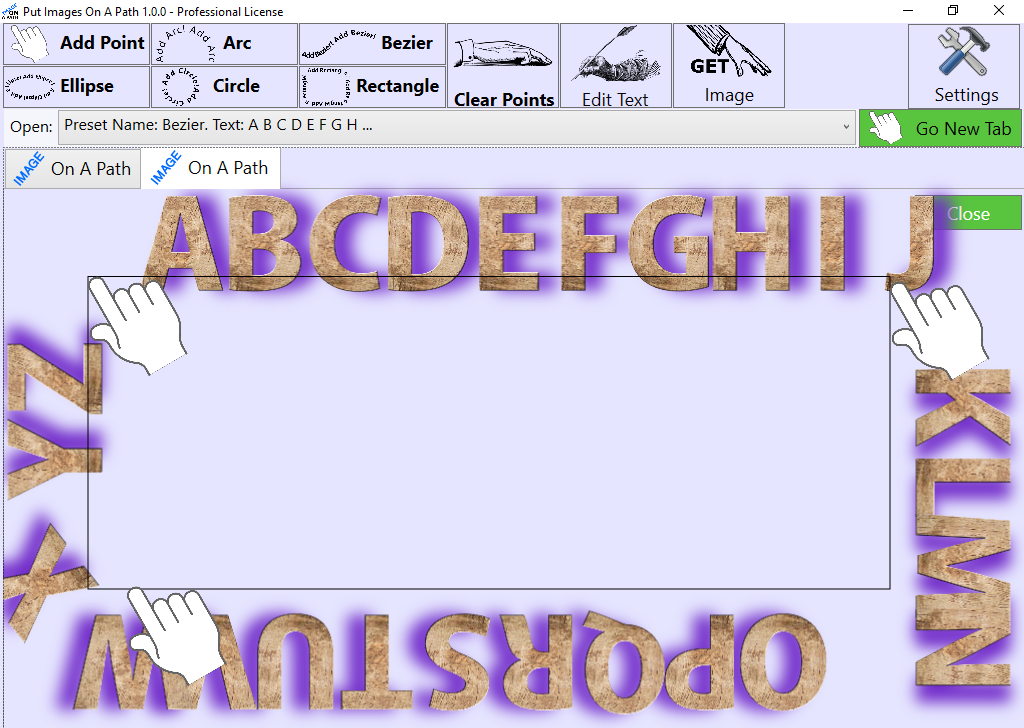
Here are several examples of images on a path:


Put Images On A Path runs on Windows XP, Vista, 7, 8/8.1, 10 and 11 - both 32 and 64 bits
Purchase the Put Images On A Path application using one of the following options:
Buy via FastSpring:
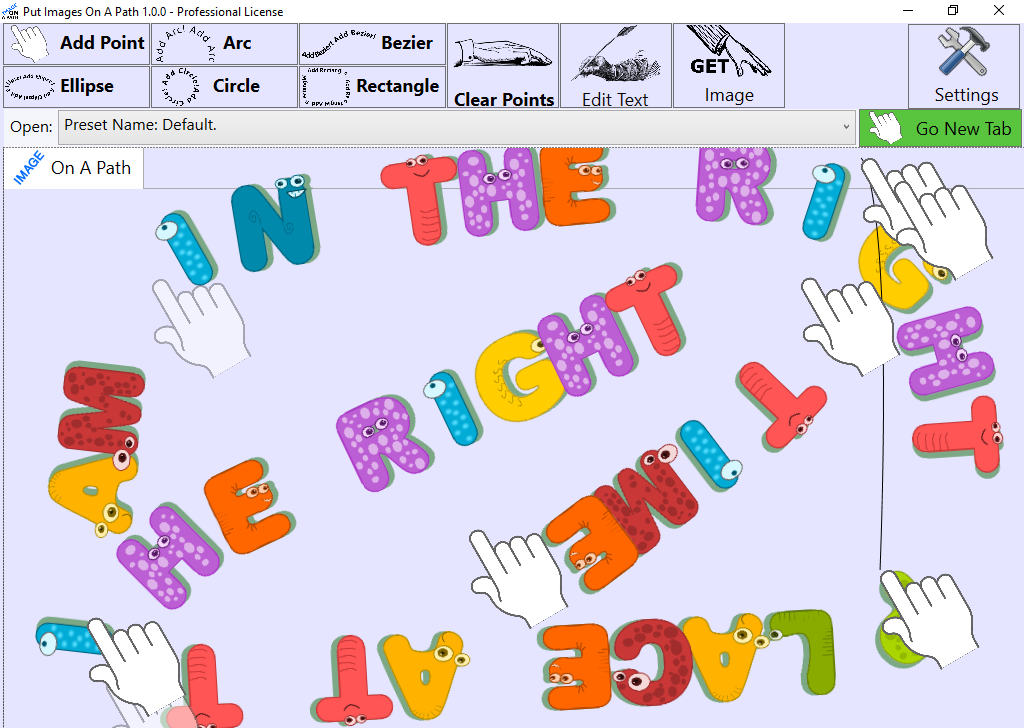
Please notice the main window of the application in the image below!
As a general overview of the main window: the hand images are there to show where each point exists on the path.
Each such point can be one of six types: point, arc, bezier, ellipse, circle and rectangle.
The text you see being rendered between those points is actually rendered using images and you can specify the text using the
top button called "Edit Text". There is an association of 1 to 1 between each character in the text and the image associated to that character.
The "Get Image" button generates and images based on the current view of the rendered text in the working area
and you can control the quality of that generated images (by setting the dpiX and dpiY) in the Settings section, notice the Settings button.
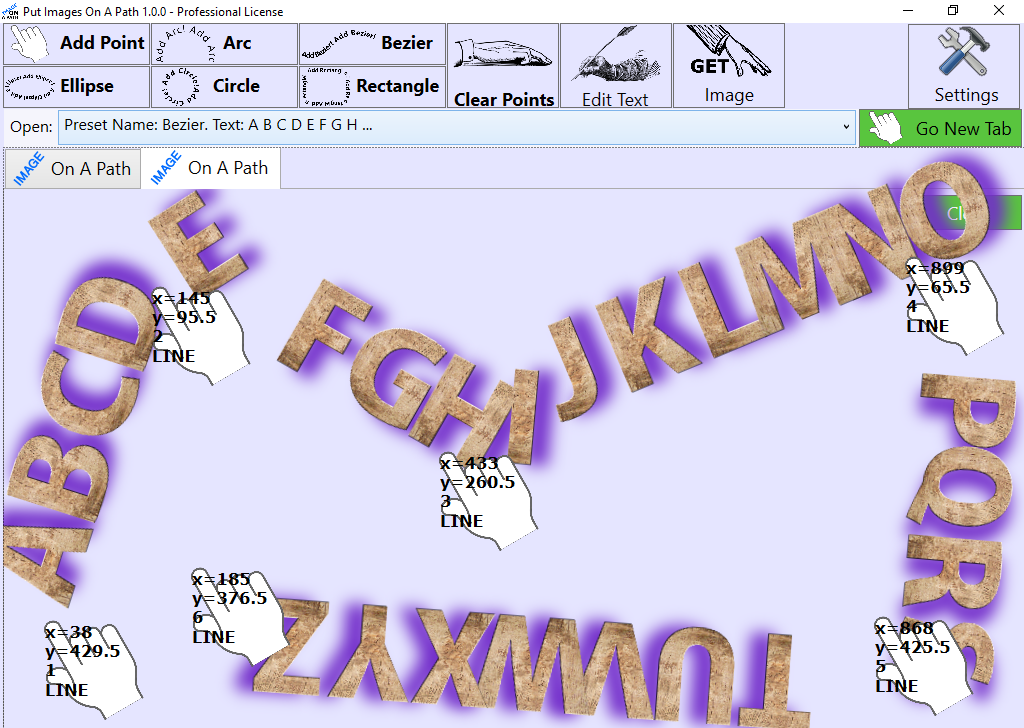
You can see the type of each point and their coordinates in real time when you right click the working area and select "Show More Data On Points"
from the contextual menu.
The properties of the two effects mentioned above are as following:
As mentioned above, there are two text effects available in the application:
The properties of each of these effects can be modified using the sidebar which appears when you move the mouse within the right most section of the working area. Here is the sidebar on the right of the working area:
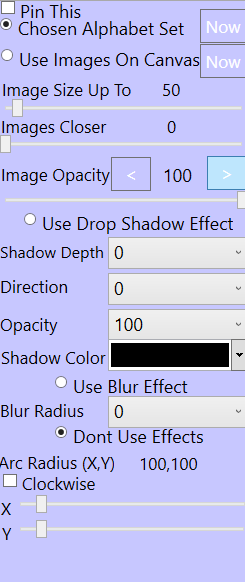
1. The Drop Shadow Effect has the following properties
The Drop Shadow Effect can be used to create 3D text easily. Just set the Shadow Depth value/property to a lower value, this lower value depends on the current font of the text but it is usually between 5 and 20. The higher the font size, the higher the Shadow Depth should be for the 3D effect to appear.
2. The Blur Effect has the following property: blur radius
The Selection Of The Alphabet:
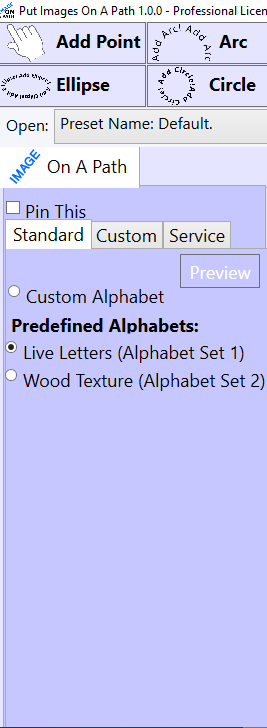
The selection of the alphabet used to render the text in the working area, can be done from the left sidebar of the working area. As you hover the mouse near the left side of the working area, a side bar will appear which contains the available alphabets, notice the images below.
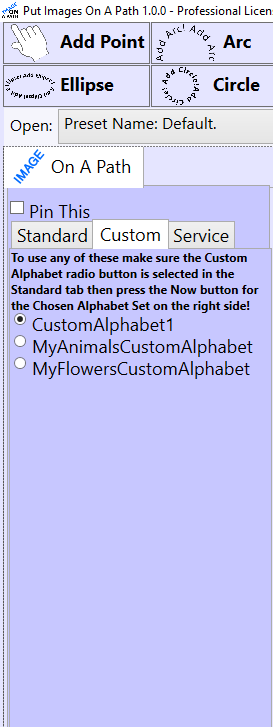
When selecting a custom alphabet make sure the "Custom Alphabet" radio button in the "Standard" tab is checked and then you can select your custom alphabet from the "Custom" tab, notice the images below.
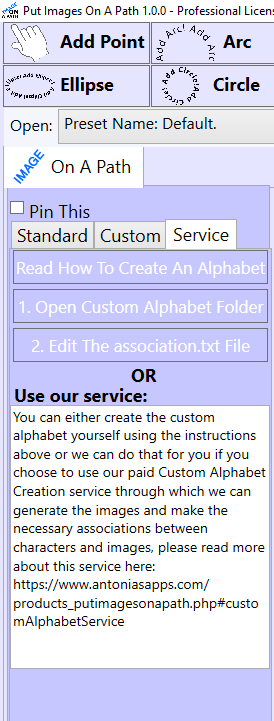
The Custom Alphabet Creation Service:
There are two levels for this service:
Level 1: you provide us with the images and we make the necessary associations and resize the images accordingly.
Level 2: besides making the necessary letter / image associations and resizing the images accordingly, we can also create the images of the alphabet for you under certain circumstances please read more about this at Level 2 below.
Level 1:
If you want us to make your custom alphabet/letters work with this application, we can do that for you for a fee, essentially we will resize the images accordingly and make the necessary associations.
For this we charge as following:
Please notice that this level (Level 1) implies that you will be able to provide us with the letters in digital format:
Level 2:
We can also build your alphabet from scratch provided that you agree on using an existing font and a texture of your choice. We could build your alphabet based on an existing available font (such as Verdana, Arial, Times new Roman, etc) and based on the texture you want (you need to send us the texture in digital form). You can also send us the font or the URL from where we can get it. We can then create the alphabet using that texture and that font. So in this case, besides resizing the images and making the necessary character / image associations we will also create the alphabet from scratch.
Since this implies a bit more work, in this case (where we also create the alphabet) we charge as following:
The instructions on how to create the alphabet for the application are present in the following places:
C:\Users\[NAME_OF_YOUR_WINDOWS_ACCOUNT_YOU_ARE_LOGGED_IN_CURRENTLY]\AppData\Roaming\AntoniasApps\Put Images On A Path\CustomAlphabets\
The Settings Window:
The Settings window (notice the top Settings button which opens that window), allows changing the opacity of the points which will appear in newly opened tabs as well as changing the image of those points.

Right clicking on the main canvas shows this context menu:
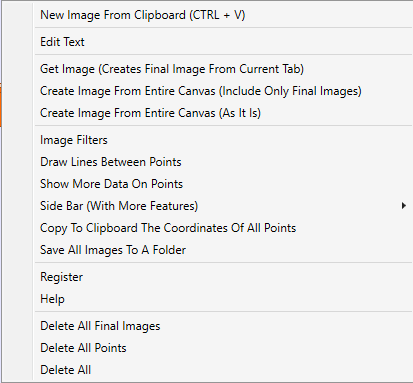
This context menu has the following options:
1. New Image From Clipboard
This creates a new movable image on the main canvas based on the image from the Clipboard. Here is an example of a use case: you could copy an image from another application to the Clipboard and then you can paste it (using this menu option) into the working area, then after creating the text image (Get Text Image button), you will be able to build a final image based on the text image which was generated and based on the image you just added from Clipboard.
2. Edit Text
This opens a window where you can edit the text you want to use on the path defined in the working area. That text will be rendered using the selected alphabet which should have an associated image for each letter in the text you specified. If there is no associated image to a letter in that text, then that letter will be rendered using the image of a question mark "?" (an image containing the question mark).
3. Get Image (Creates Final Image From Current Tab)
This creates a movable image, based on the images you provided, based on the path formed by the points and also based on the values/properties of the effects. The new movable image is added in the working area. You can copy it to the Clipboard to move it to a new tab or you can save that image to disk.
4. Create Image From Entire Canvas (Include Only Final Images)
This creates a movable image, based on the final images. A final image is the one of the following: either an image which you drop on the canvas (working area) or the actual image which can be generated from the current canvas (working area). On the canvas (working area) there are also the points (the hands) which are used to generate the path of the images, those points are not considered to be final images because they should not appear in the final (text) image or in any image which can then be used in another application.
5. Create Image From Entire Canvas (As It Is)
This creates a movable image, based on any image on the canvas, so this includes both the points/hands used to create the image path as well as the final images.
6. Image Filters
Will open a window containing all available image filters in the application. You need to double click on any of the filters to open a window for that specific image filter.
7. Draw Lines Between Points
This option shows/hides the lines between the existing points, no matter the type of point (LINE, ARC, BEZIER).
8. Show More Data On Points
This option shows/hides more information on top of each point, specifically it shows the coordinates of the point: x and y, it shows the order of the point (order in which the point was added to the canvas/working area) and the type of the point: LINE, ARC, BEZIER, CIRCLE, ELLIPSE, RECTANGLE.
9. Side Bar (With More Features)
The Side Bar appears when you hover within the right most section of the canvas/working area and is hidden when you move away from that section. However, the Side Bar can be pinned so that it stays visible until you unpin it. Pinning the sidebar is useful because you may want to work both in the main canvas section and also change the properties of the items in the canvas section.
10. Copy To Clipboard The Coordinates Of All Points
This feature was provided as an easy way to define any shape based on the points on the canvas.
11. Register
Shows the registration window. This menu option will be shown even when the application is registered, and the reason for this is that if the application is registered, at times you may want to go to the registration window again and from there to the purchase page, just in case you may want to purchase another license.
11. Help
Shows this help window!
12. Delete All Final Images
Deletes only the final images from the canvas/working area. A final image is the one of the following: either an image which you drop on the canvas (working area) or the actual text image which can be generated from the current canvas (working area). On the canvas (working area) there are also the points (the hands) which are used to generate the path of the text, those points are not considered to be final images because they should not appear in the final text image or in any image which can then be used in another application.
13. Delete All Points
Deletes the points/hands in the canvas/working area. You can then add new points/hands using the top buttons. Clearing all the points is very useful when you want to keep using a text effect for which you selected specific values but you want to change the path the images will follow, for example if you have a line and an arc, you may want to switch to using a line and a Bezier curve but keep the same images and effects.
14. Delete All
Deletes all final images and all points on the canvas.
Image Filters Window
When you right click the canvas/working area you can select the 'Image Filter' option which will open the window with the available Color filters. When you double click one of the filters, the associated window of that filter will open (the window will contain any available parameters and the Apply button). The filter will work on the last clicked image on the canvas/working area.
Here are the available Color filters: Blur, Fish Eye, Grayscale, Grayscale (transparency), Invert, Jitter, Mirror, Oil Painting, Pad Left, Pad Right, Pad Bottom, Pad Top, Pad All Sides, Rounded Corners, Replace Channel, Set Channel Value, Sharpen, Skew, Sobel Edge Detector, Switch Channel, Trim Border, Water Wave.
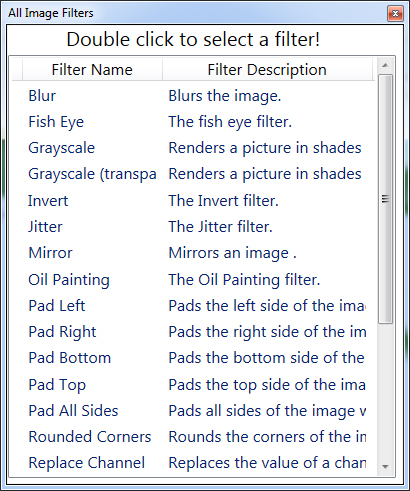
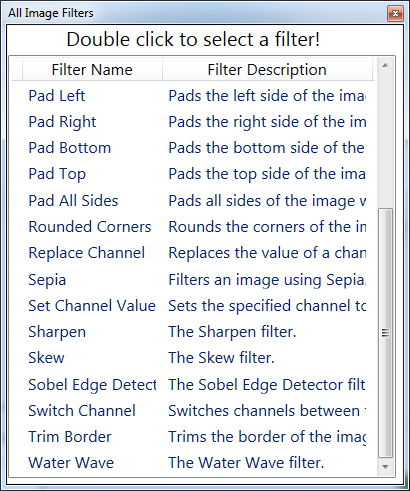
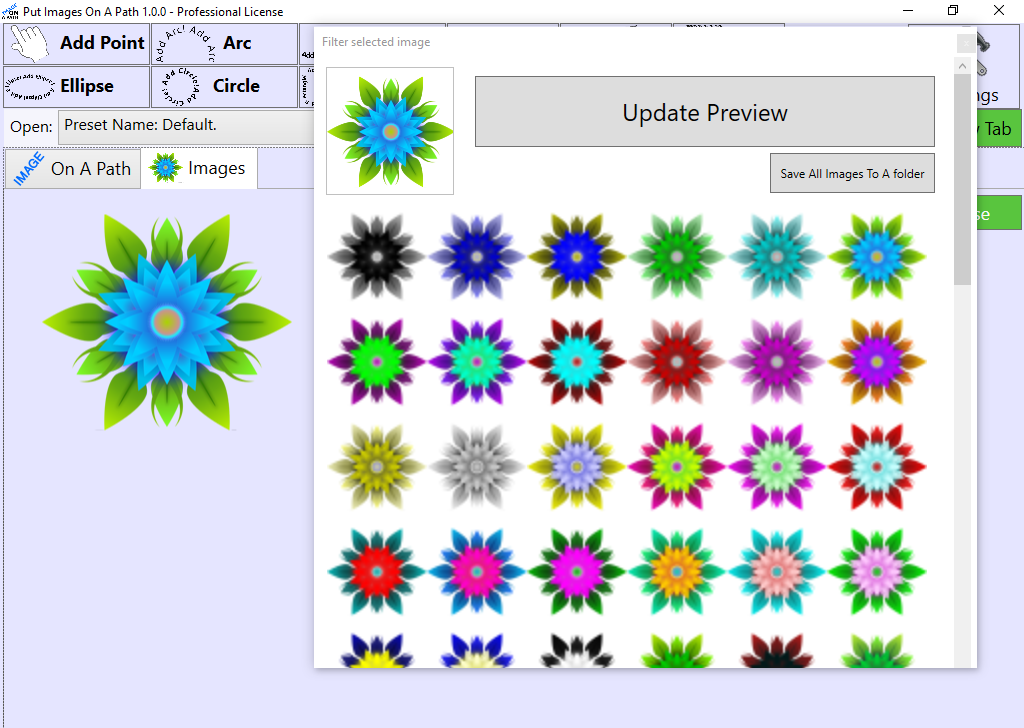
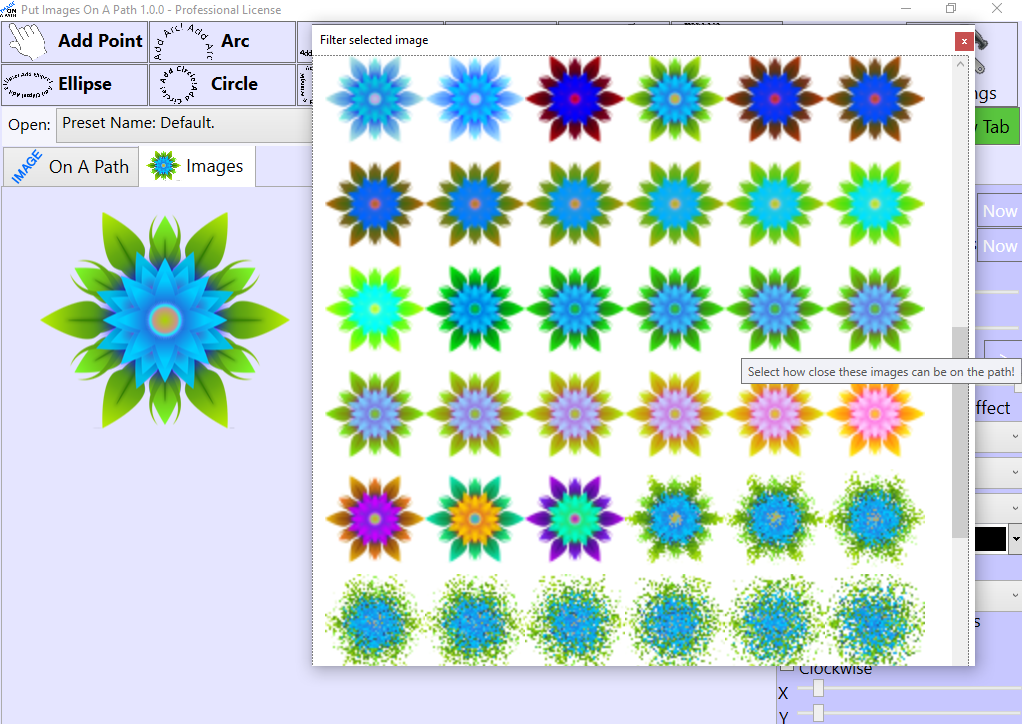
Image Filters With Preview Window
You can right click any image and select the 'Image Filters With Preview' option to filter the selected image using 94 filter variations. You can then click on any of those filtered images (filter variations) and the filtered image will be transferred to the initial image, the one on the canvas on which you right clicked initially.
Each filter in the Image Filter Window has a description attached to it, so that you know how that image was filtered. The filter description appears as you hover over the filtered image.

Shortcuts:
Other things to consider:
1. When deleting points: some paths are defined by multiple points and we could have for example a circle which is defined by two points, one for the center and one for the radius. When one of those points is deleted, the associated point of that circle is also deleted. Similarly this happens for an ellipse (which needs 3 points), for a rectangle (which needs 3 points) and for a Bezier curve (which needs 3 points).
2. When defining a path, you can have multiple instances of any of the following: POINT, ARC, BEZIER. This allows creating pretty much any shape you can think of.
3. When defining a path, there can be only one Circle, or one Ellipse or one Rectangle which is taken into consideration to have the text / images on it.
4. When working with ARCs: the sidebar has two sliders toward the button, those sliders affect the RadiusX and RadiusY of the last selected ARC. So in order to use those sliders with any of the existing arcs, you must first click on the ARC for which you want to modify the RadiusX and RadiusY.
5. You can save the final images with transparency to a PNG file on the disk.
6. When copying the image to the Clipboard and then you paste it into another tab within this application, the transparency of the image is kept. However when you copy the image to the Clipboard and paste it into another application, the transparency of the image may not kept, but you could save it to the file as a PNG (which preserves transparency) and then you could load it into the application in which you want to process it further.
7. The standard alphabet sets support at least the following a through z letters and 0 through 9 numbers.
8. The CustomAlphabet1 custom alphabet was provided so you can make a copy of it (make a copy of that entire folder and name the new folder anyway you want, for example you could name it AlphabetWithAnimals). The application will read that new folder as a new alphabet. In there you can edit the associations.txt file and add the (.png) images of your choice. It's that easy creating a new custom alphabet.
Registered versus un-Registered
In the registered version of the application you can do the following:
- edit the text you want to use on a path.
- the movable images can have any width and height you want.
- you can rotate the images the full 360 degrees.
- you can add any number of final images to the canvas.
- you can change any existing image on the canvas to another image found on your hard disk.
In the un-registered version of the application:
- you cannot edit the text you want to put on a path. However you can test the application as long as you want, using the existing presets which have different texts.
- you cannot edit the text you want to put on a path. However you can test the application as long as you want, using the existing presets which have different texts.
- an image can have a width of up to 200 pixels.
- an image can have a height of up to 200 pixels.
- an image cannot be rotated over a certain level.
- you can add up to 10 final images (plain images) on the canvas/working area
- there can be up to 10 final images on the path
- you cannot change any existing image on the canvas to another image found on your hard disk.
Check out more screenshots below!
When you have multiple images on a path you can bring them closer using the 'Images Closer' slider!
Below you can see the result of using the 'Images Closer' slider:


Version History
Version 1.0.2 (December 2023)
Version 1.0.1 (November 2023)
Go To Top